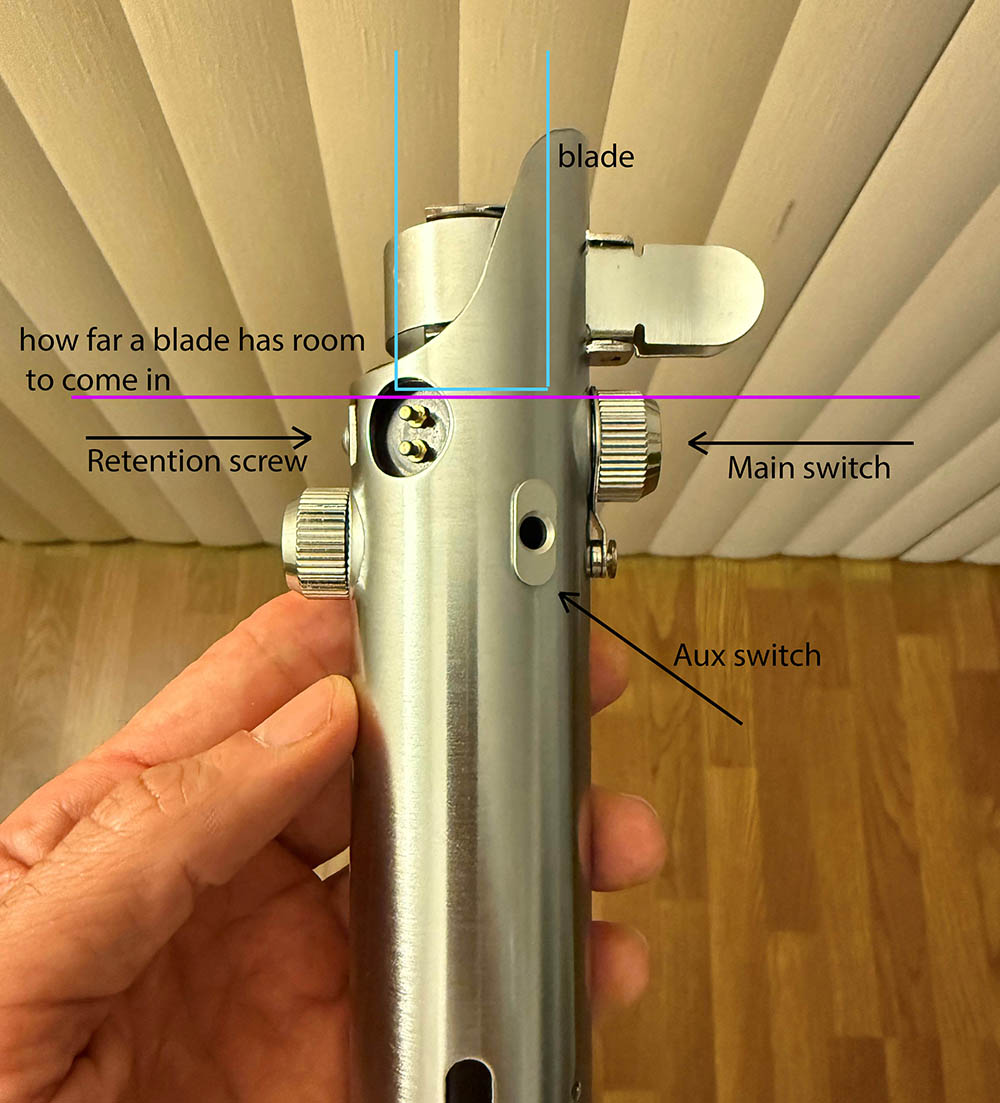
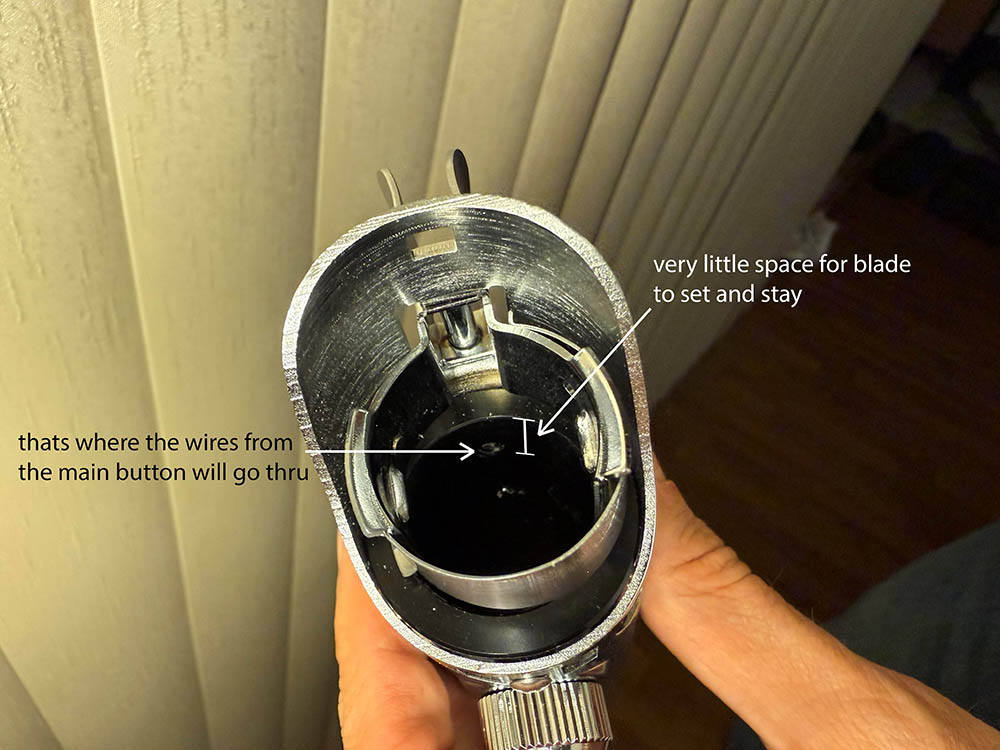
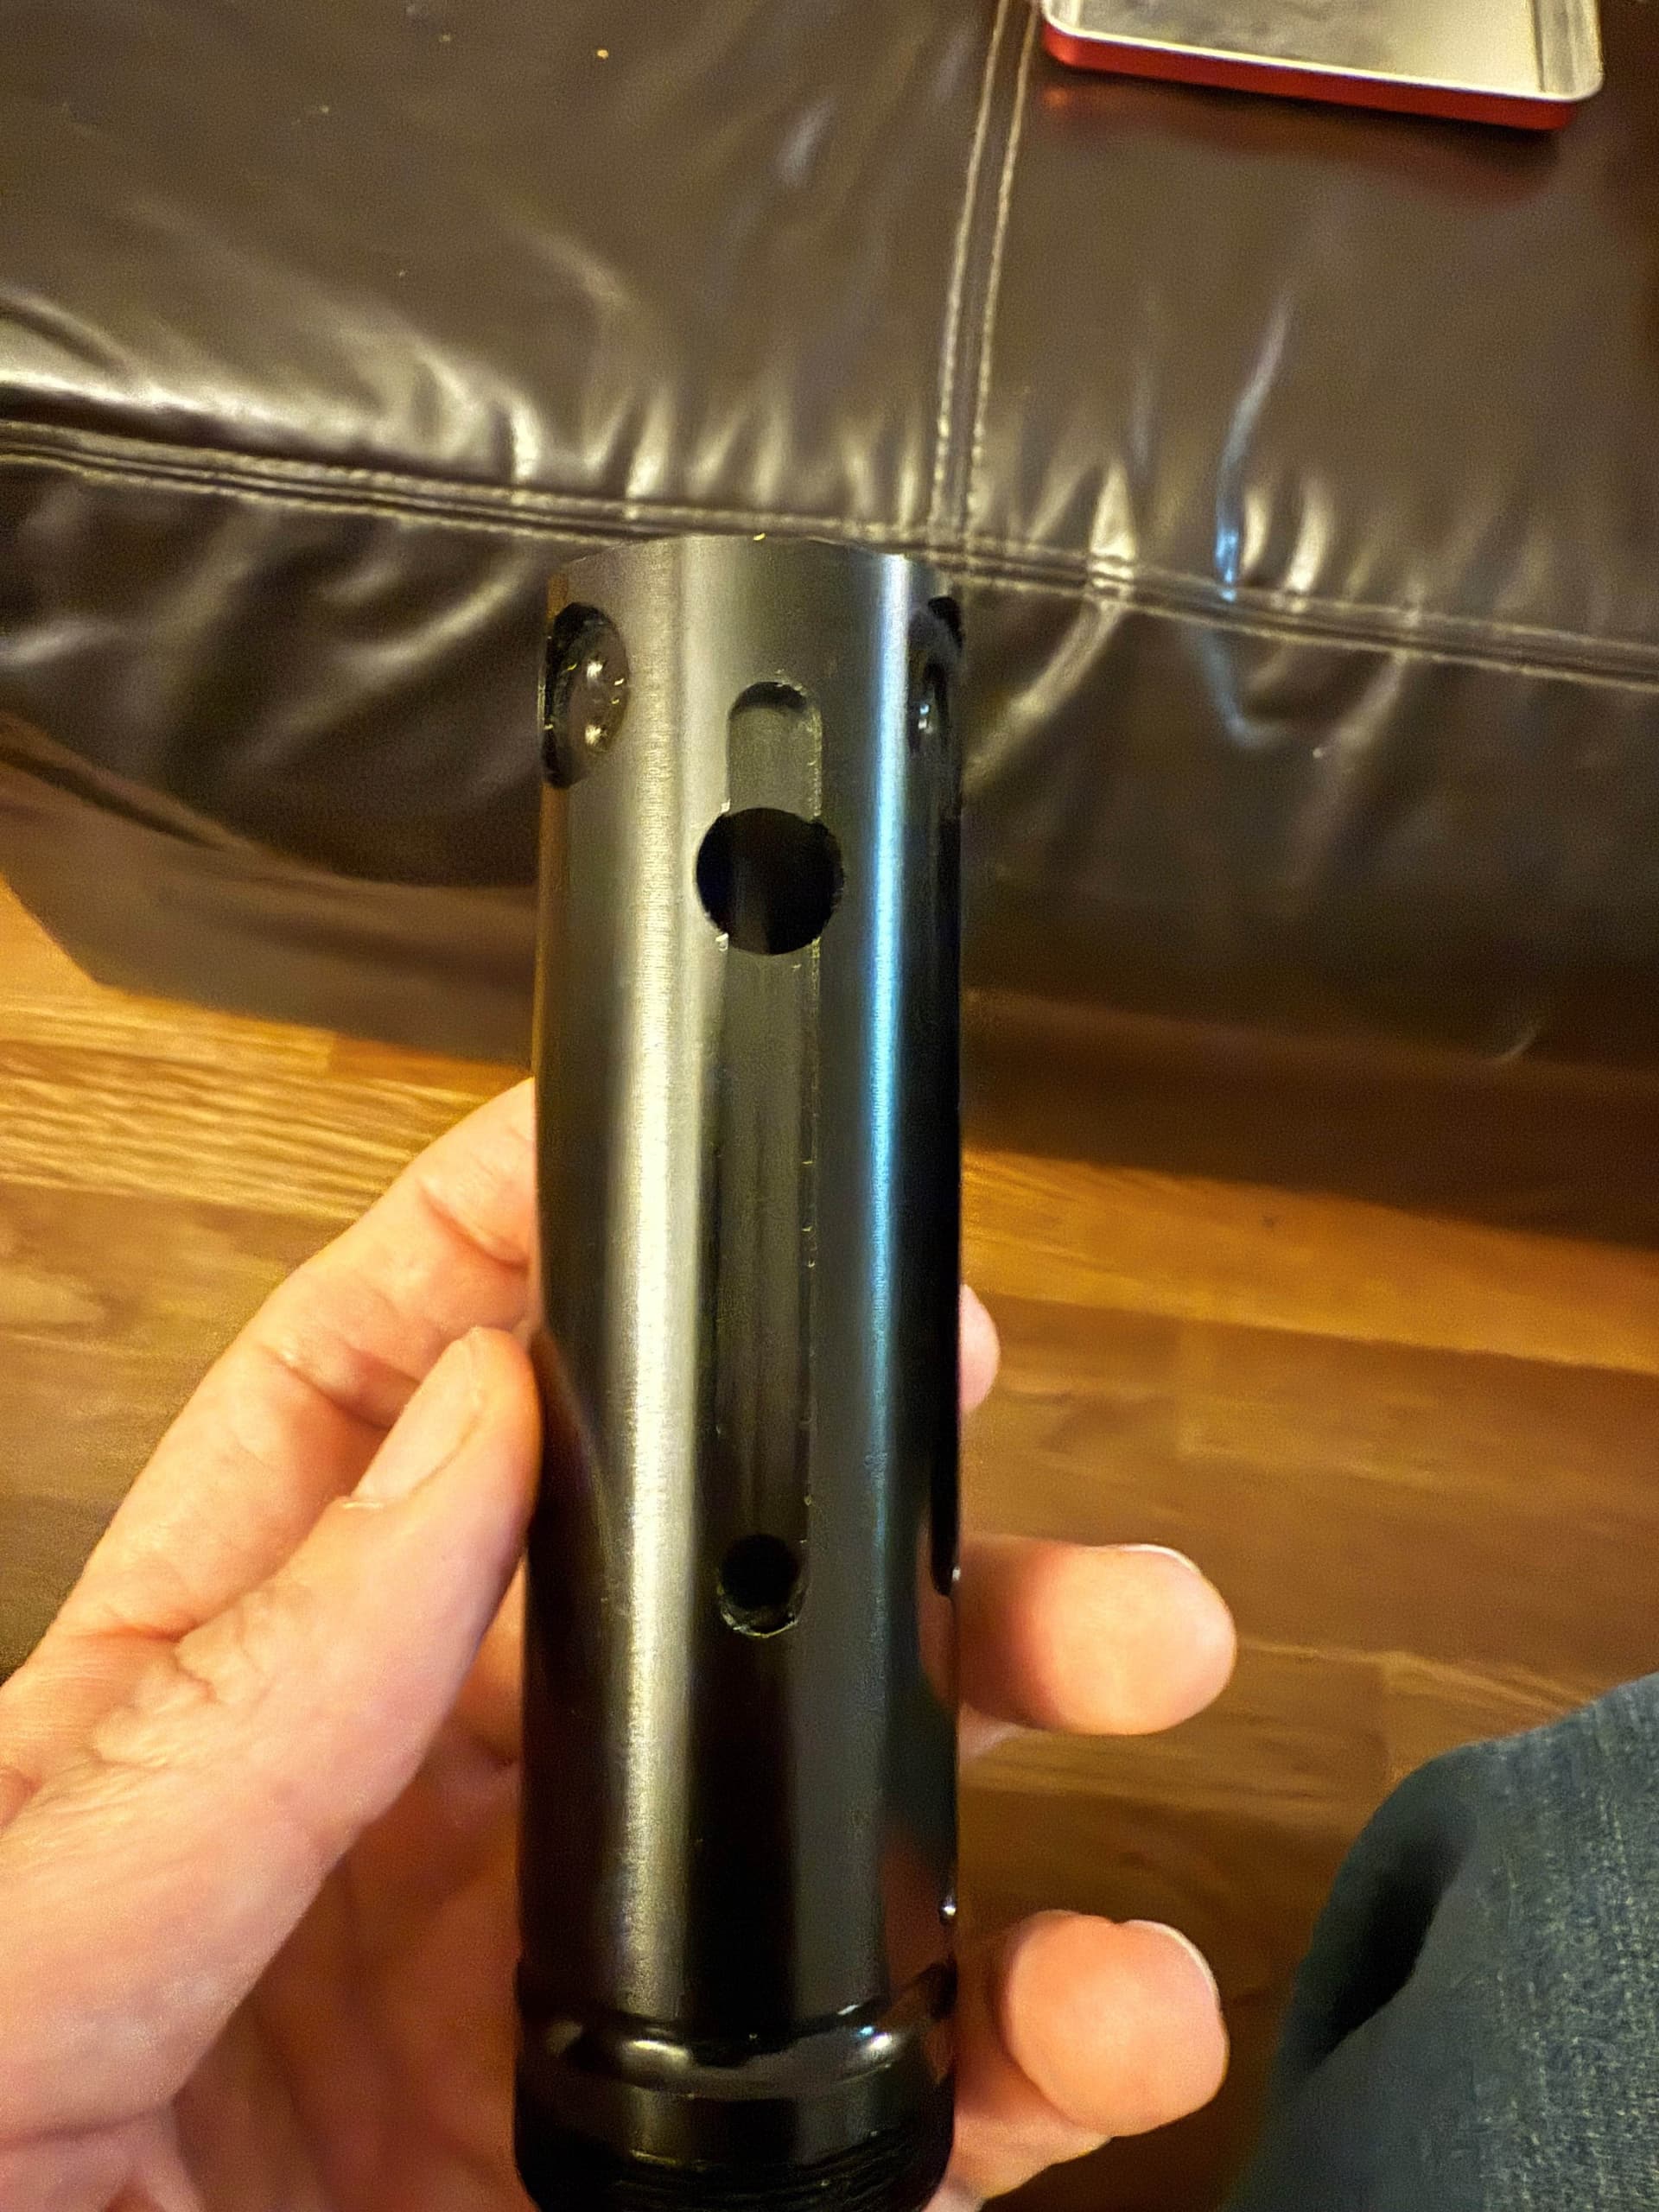
Hello there, I wanted to ask some questions regarding a setup on my graflex 2.0. as in the photo I figured out where the main button will go and I wanted to make the side oval location for the aux button. The question I have is since the location of the main button so up high on the hilt how would the logistics of the blade going into the hilt and retention screw work? The thing is the blade will probably pass through the main button area which will not work since I need to wire up the main switch through the hilt. I’m also making a custom chassis for this hilt and if I bring the top of the chassis high enough to pass the main button on the hilt there is practically little to no space left for the blade to get pressed into the hilt to stay put. So how do other people do this? Any help would be greatly appreciated.
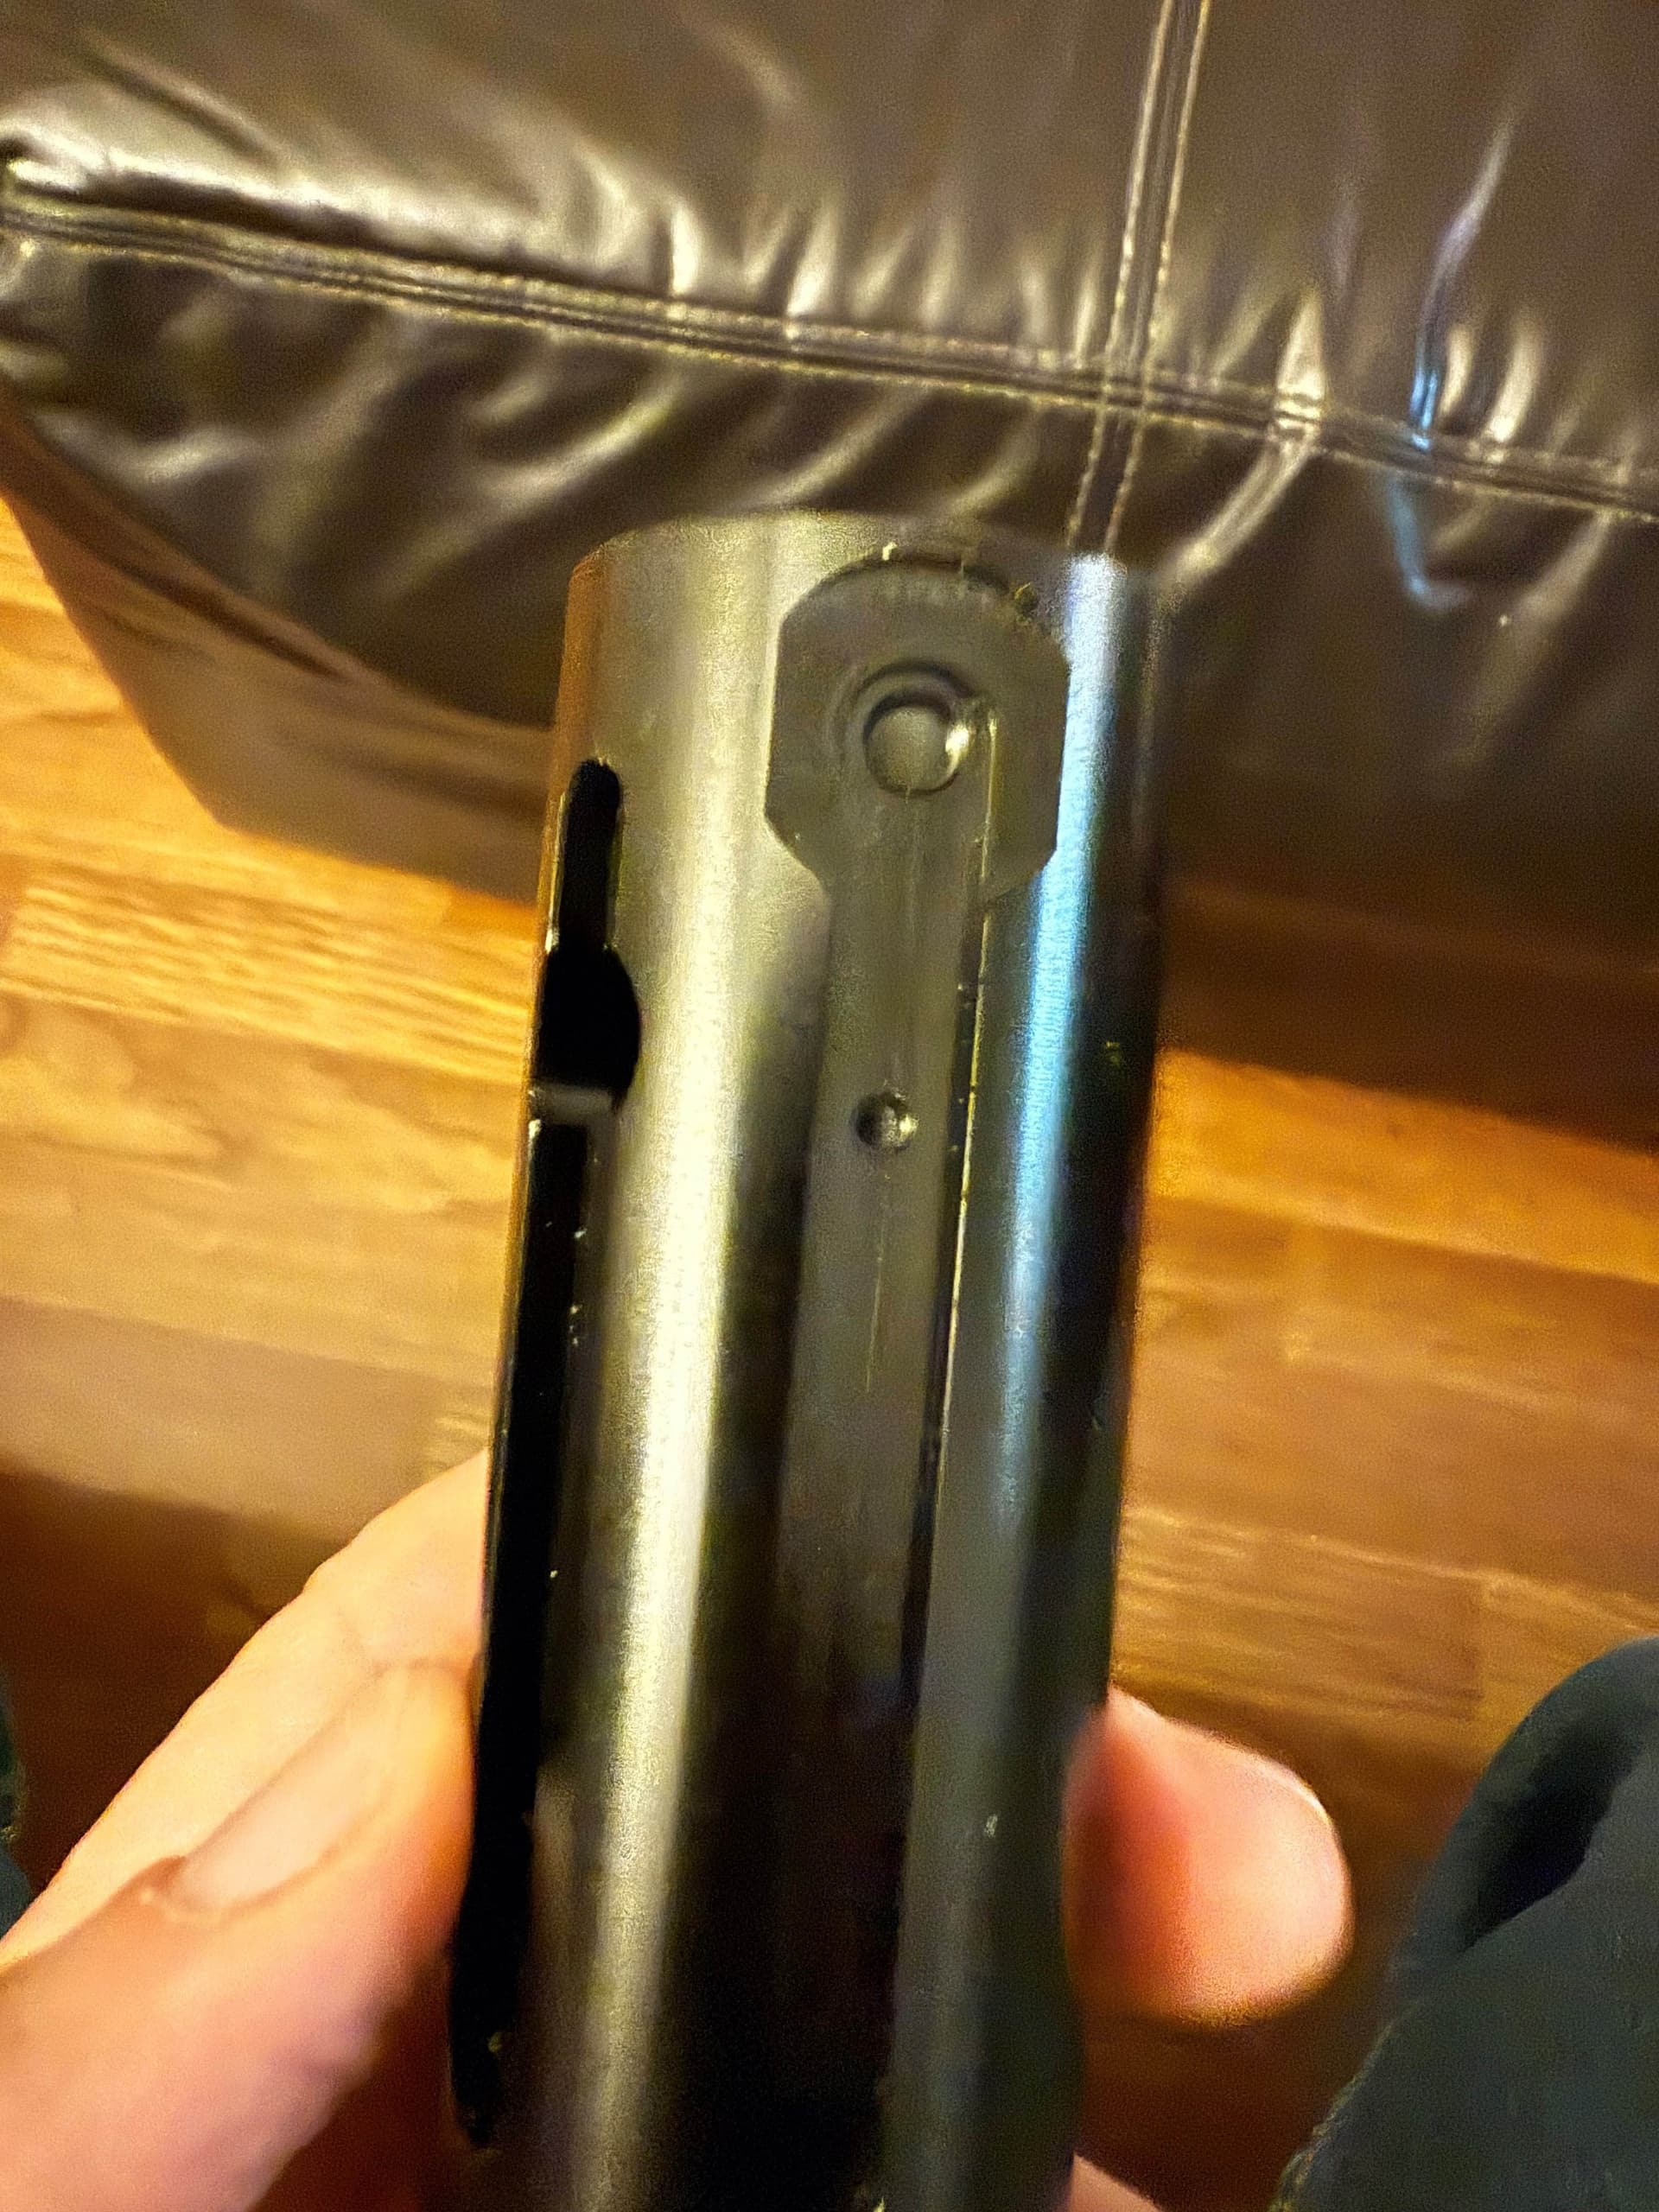
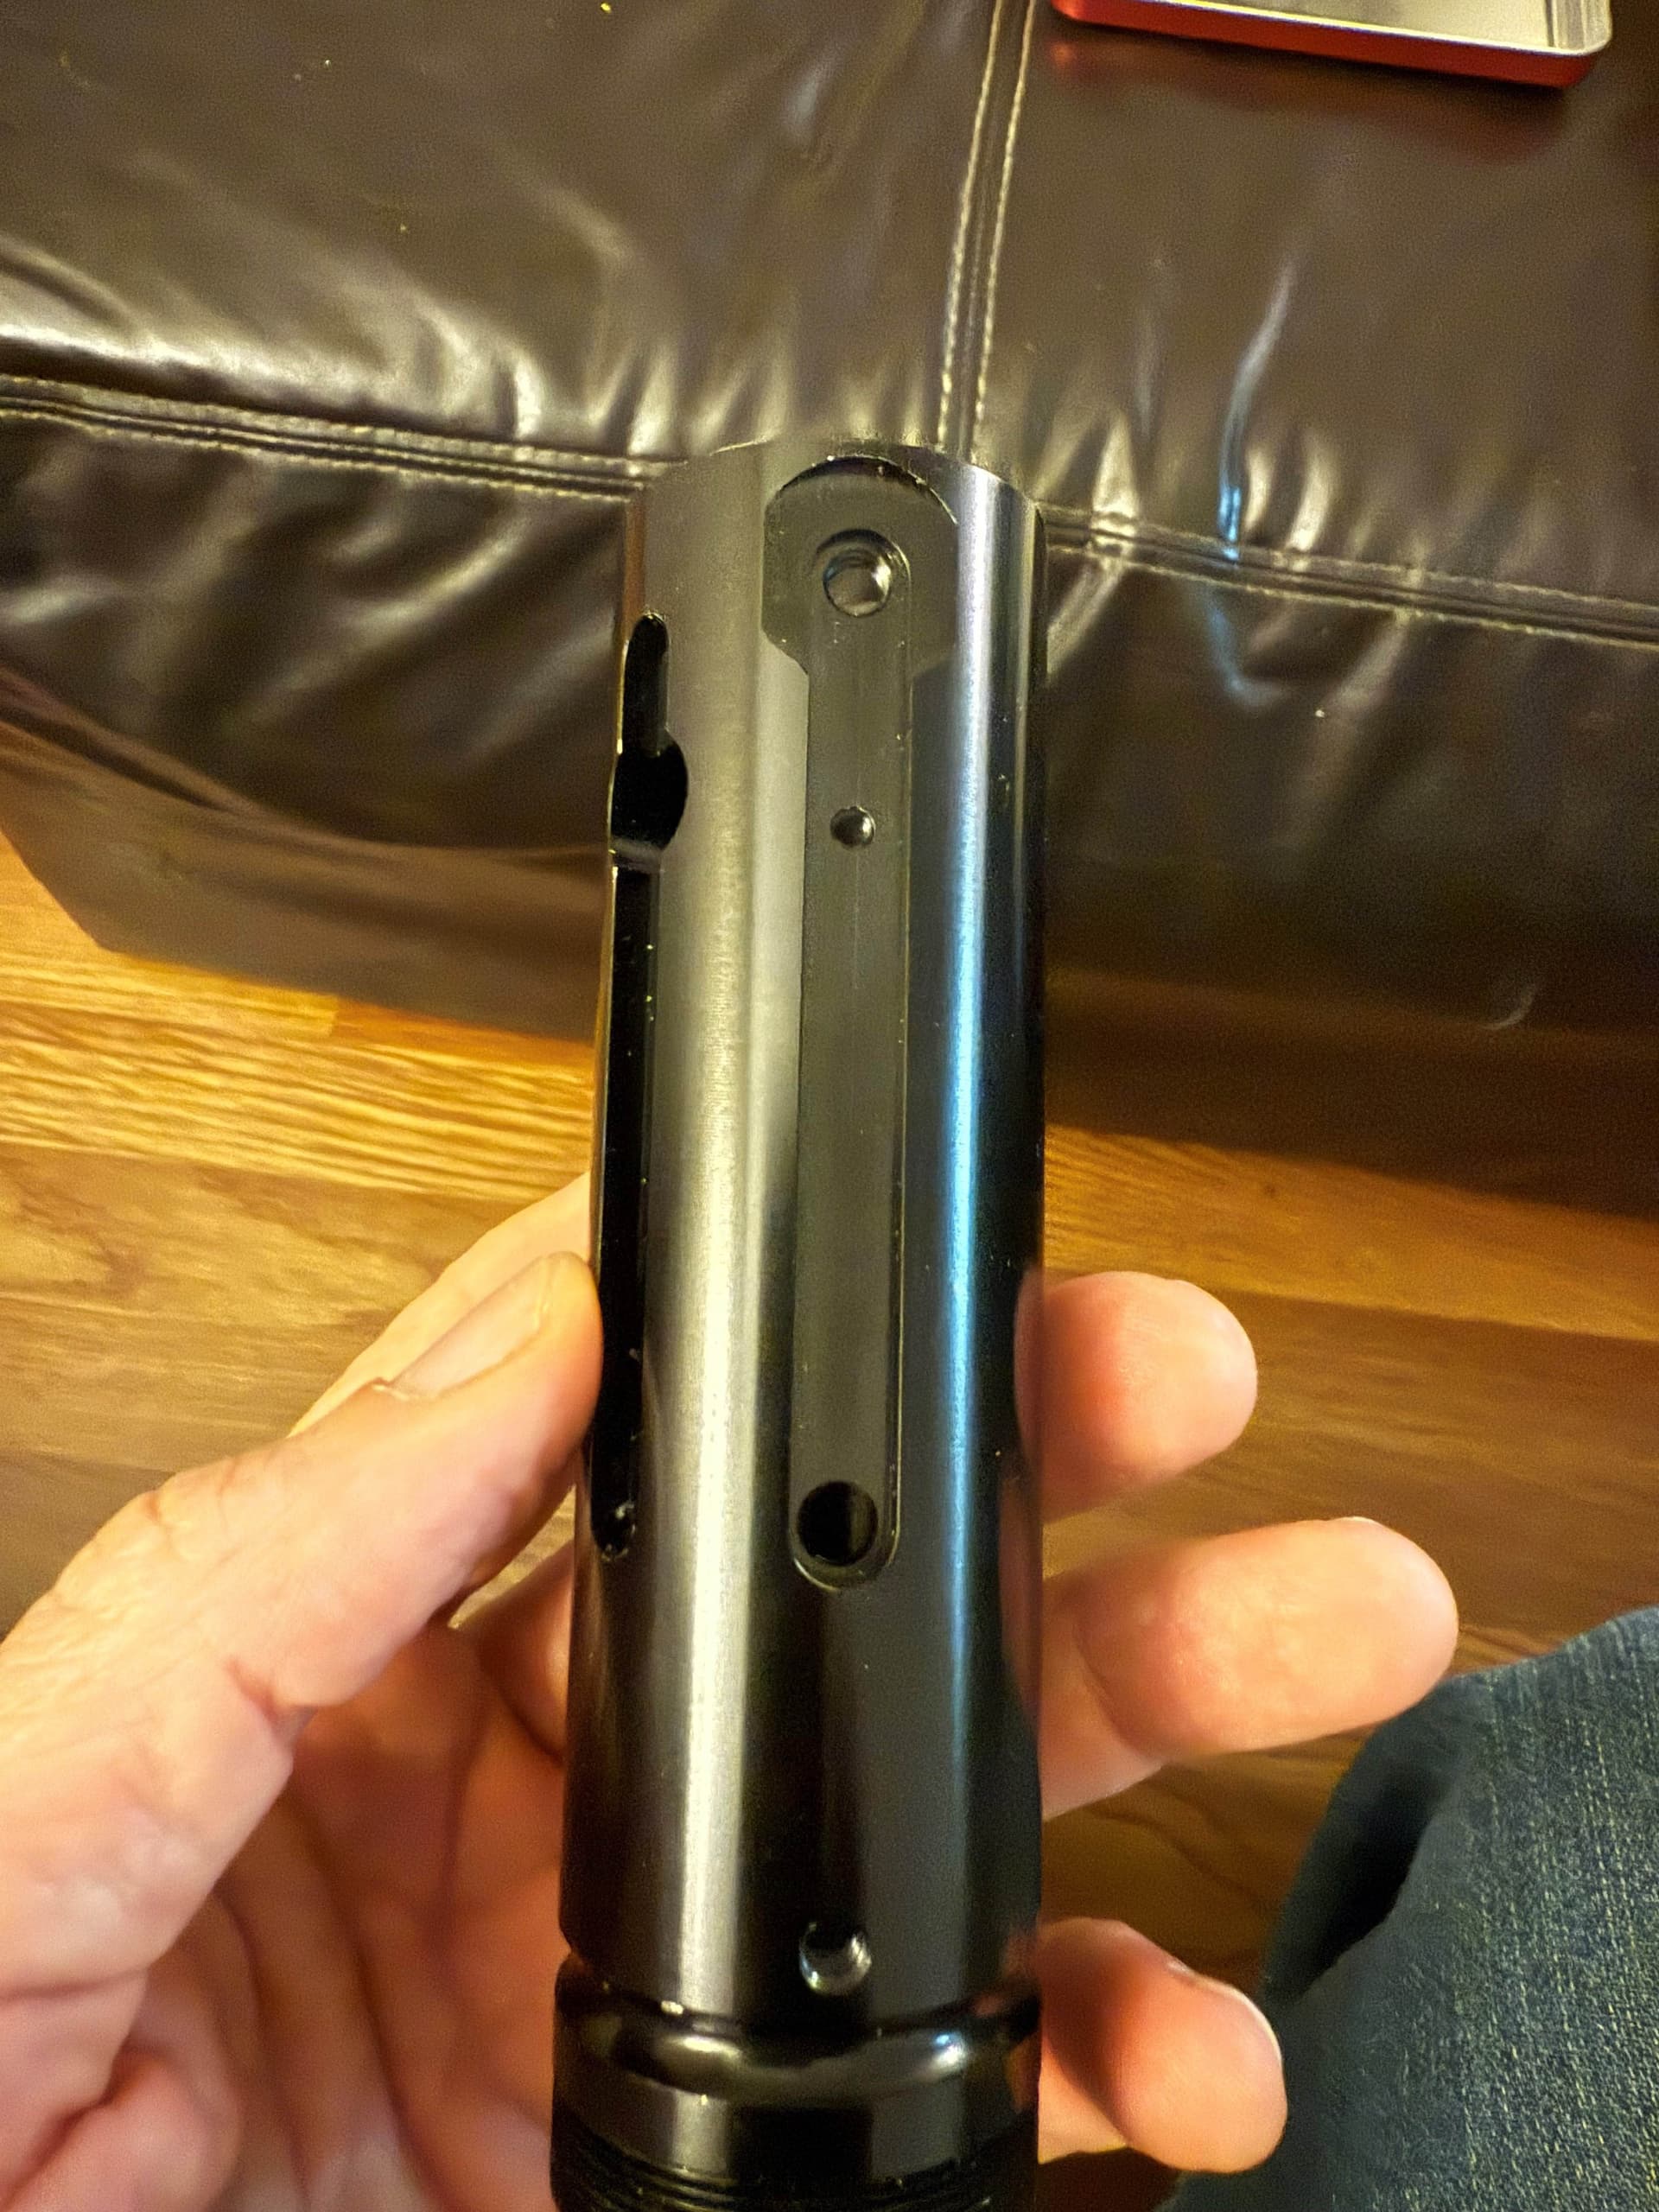
The aluminum inner structure is thick enough to remove some material and run the wires on the outside. See this thread:
I did this with a cnc machine because I have one, but it can be done with a dremel. This gets the wires down far enough to run into the chassis. You could place it where ever you want.
The aux will be harder because there is nothing inside to retain it. You could devise something, but this hilt is really intended to be a 1 button hilt.
oh my… this is going to be a hard projects since i only have a dinky dremel… thank you for the info Orntar ![]()
Your welcome.
I forgot to mention that you can put buttons under the clamp card and skip all that other stuff. Search for graflex clamp card switch holder
much appreciated your help sir.
With a clamp switch set up you’ll drill a hole for the wires to pass through between those aluminum ribs. Above the threading, in the space cut out of the upper shroud.
I’ve done both set ups with hand tools, and it’s kinda hard but doable. The metal is soft.
The Graflex 2.0 is not the easiest installation. Orntar’s chassis design allows for both set ups!
i assumed when i got the empty hilt it was somewhat install friendly being that it was meant for a saber.
Well, this 2.0 is an old model and back then we were excited that they were “install possible”. Install friendly is a newer idea. You’re kind of working on a vintage replica, if that makes sense.
are there any better hilt you can suggest?
I think its a really cool hilt, but if you feel like its too much, maybe shelve it for a while till you get to it.
You can’t go wrong with kr sabers and they can provide a chassis for it as well. thesaberarmory.com
89sabers does some really good hilts as well. Look at saberbay.com for those.
After opening the hilt i realized the inner black insert is actually a modified verion i purchased way back and it has all the space i need to wire the button from the outside of the inner tube. that is complelty my bad for not checking first before posting. but now i come a cross another issue. I want to be able to take the chassie in and out of the hilt if i want to . and if I run the wire from the hilt to chassie then i wount be able to take the chassis out complely because its connected the the switch wire. is there anyway to be able to make it so when i insert the chassis it will connect to the button on the hilt? I maybe pushing my luck but i figure i try ![]()
Yes, you can (theoretically) do that. You would need to make a chassis that goes in just the top, it would house the blade pcb and multi trace pcb for connection to a removable lower chassis.
So you would probably need to design both of these parts, and make sure they can fit all the parts needed.
Let me see if I can find a picture, its pretty common hilt chassis design.
is there a special PCB for the lower chassis to connect to the blade pcb part? i guess what im asking is to connect the lower chassis to the upper chasses what type of pcb do i need to use?
Yes. Here is a chassis that use 2 parts:
the upper skinny part is separate and houses the pcb. The lower houses the matching pcb, battery, proffie, speaker, etc…
Here is one style of pcb (probably the most used?):
There are other styles as well.
dont know how to thank you. this is great ![]()