How to use the Blade ID to detect no blade is inserted?

So i like that effect that the anakin saber has when the removable blade is not inserted it plays the broken saber from AOTC. So i started reading the manual and i was wondering.

In a build that has no resistor in the blade. I need to add the resistor to the inhilt pcb.

My pcb is the oshpark one. Where do i put it on this?

Somewhere bridging data and GND.
Screen Shot 2022-07-08 at 1.26.29 PM

You could also try no resistor and just use
#define BLADE_ID_CLASS SnapshotBladeID<bladeIdentifyPin>
Then in the BladeConfig, have your NoBlade array use like 200000 for the value.

1 Like

Hold up.
Blade ID (and it’s associated resistor) is not required for blade detect, which is generally what you use to check if a blade is there or not. blade id can tell you which blade is there, which is also useful, but different from what I think you are trying to do.

1 Like

Also, putting a blade ID resistor on the hilt side is not helpful, ever.

Unfortunately, that’s what the manual (page 21) says to do. I assumed the idea is that the cumulative addition of the resistor gets it into a readable range when added to the native value of an non-resistored blade?

I suppose it could be useful if you have multiple chassis you want to identify?

1 Like

Although looking again just now, it’s wired to the Blade Detect pin, so it’s certainly a bit odd

I can say this.
I just setup something 2 nights ago using SnapshotBladeID that worked as follows:

  • Chassis only (no blade) ID:~500
  • Chassis inserted into hilt , now connected to hilt-side PCB ID: ~600
  • Add blade in parallel to hilt-side PCB ID: ~700

Setting up 3 blade arrays at the detected value for each state, using no resistors, did indeed work.

( I also did a hacky thing and made it do blade_id.id() every 2 seconds looking for a change, and that seems to work as well for “on-the-fly” state changes )

1 Like

Running blade id while the blade is on doesn’t work, so I hope you check for that…

Well of course what I hacked together is likely not proper and just happens to work apparently. I don’t know where a discussion on it would go, because here doesn’t seem appropriate. I don’t know if a PR is needed so as to view/review the code (do something in my fork?), or just a side PM conversation, or…?

Oh wow, i was trying to also get my 36" and 32" blades detected so I dont have to use the length editor.

The config would look like this

#ifdef CONFIG_TOP

#include "proffieboard_v2_config.h"

#define NUM_BLADES 1
#define NUM_BUTTONS 2
#define VOLUME 1780
const unsigned int maxLedsPerStrip = 144;
#define CLASH_THRESHOLD_G 3.5
#define ENABLE_AUDIO
#define ENABLE_MOTION
#define ENABLE_WS2811
#define ENABLE_SD
#define FETT263_BATTLE_MODE_START_ON
#define FETT263_LOCKUP_DELAY 200
#define FETT263_BM_DISABLE_OFF_BUTTON
#define FETT263_SWING_ON
#define FETT263_SWING_ON_SPEED 250
#define FETT263_TWIST_OFF
#define FETT263_TWIST_ON
#define FETT263_STAB_ON
#define FETT263_THRUST_ON
#define FETT263_FORCE_PUSH
#define FETT263_FORCE_PUSH_LENGTH 3
#define FETT263_MULTI_PHASE
#define MOTION_TIMEOUT 60 * 15 * 1000
#define COLOR_CHANGE_DIRECT
#define DISABLE_DIAGNOSTIC_COMMANDS
#define IDLE_OFF_TIME 60*5*1000
#define BLADE_ID_CLASS 
#endif


#ifdef CONFIG_PRESETS

Preset blade[] = {

SnapshotBladeID<bladeIdentifyPin>

};

Not quite.
You’d add defines to your CONFIG_TOP section
#define BLADE_ID_CLASS SnapshotBladeID<bladeIdentifyPin>
and
#define ENABLE_POWER_FOR_ID PowerPINS<bladePowerPin2, bladePowerPin3>
for whichever LED pads power your blade.

You can (but do not NEED to) have multiple presets sections, one for each blade, something like

Preset 32blade[] = {
....presets go here....
};

Preset 36blade[] = {
...presets go here....
};

Preset noblade[] = {
...presets go here....
};

However many you choose, you can assign any one to a blade by changing the name in the CONFIGARRAY() in the BladeConfig as shown below.

Then in your BladeConfig, you’d have corresponding arrays for those 2 sections, with the resistance values and pixel counts for each.

BladeConfig blades[] = {
{  20000, // whatever your 32 inch blade resistance value goes here
  WS281XBladePtr<128, bladePin, Color8::GRB, PowerPINS<bladePowerPin2, bladePowerPin3> >(),
CONFIGARRAY(32blade),
"32blade_save"}, 

{  33000, // whatever your 36 inch blade resistance value goes here
  WS281XBladePtr<132, bladePin, Color8::GRB, PowerPINS<bladePowerPin2, bladePowerPin3> >(),
CONFIGARRAY(36blade),
"36blade_save"}, 

{  200000, // No blade
  WS281XBladePtr<132, bladePin, Color8::GRB, PowerPINS<bladePowerPin2, bladePowerPin3> >(),
CONFIGARRAY(noblade),
"noblade_save"}, 
};

You still need a blade definition for the noblade array, but it doesn’t matter what it says really. I just copied the previous one, that’s fine.

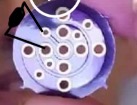
62.9 is the Ω reading on my 32" when i set it to 200K Ω, and the 36" is 32.8Ω does that mean the Ω is in the thousands. E.G. 62900 AND 32800 FOR THE BLADES?

Is that from typing scanid in Serial Monitor?
It will give you an ID: XXXX

So you installed a 200k Ω resistor in your 32" blade?

The values you enter in the blades arrays should be based on what scanid tells you.

Clarification, I used a multimetere

To things to note:

  1. Measuring the blade ID resistor in a blade only works if the blade is powered. If it is off, you are most likely measuring the power-leaching effect of the neopixels instead.
  2. If you’re using the SnaphostBladeID blade ID class. (Which is the default for V2 boards.) then the blade ID is not really measuring just the resistance of the blade ID resistor. Instead, it is charging up the blade like a capacitor, and seeing how long it takes to discharge. Basically, it’s treating it like an RC circuit, so both the resistance and the capacitance of the blade matters in that case. It’s not possible to measure the RC value of the blade with a multimeter.
1 Like

Aaaah ok. Thanks @profezzorn learnt something new. Cool.

Clarifying that this means there’s power available to the blade, but not ignited and “on”?.

It should work even if the blade is on.
However, it will not work while we are transmitting data to the blade, which is most of the time when the blade is on.
I would expect that the measured values might come out slightly different when the blade is on, but not enough to matter.

2 Likes