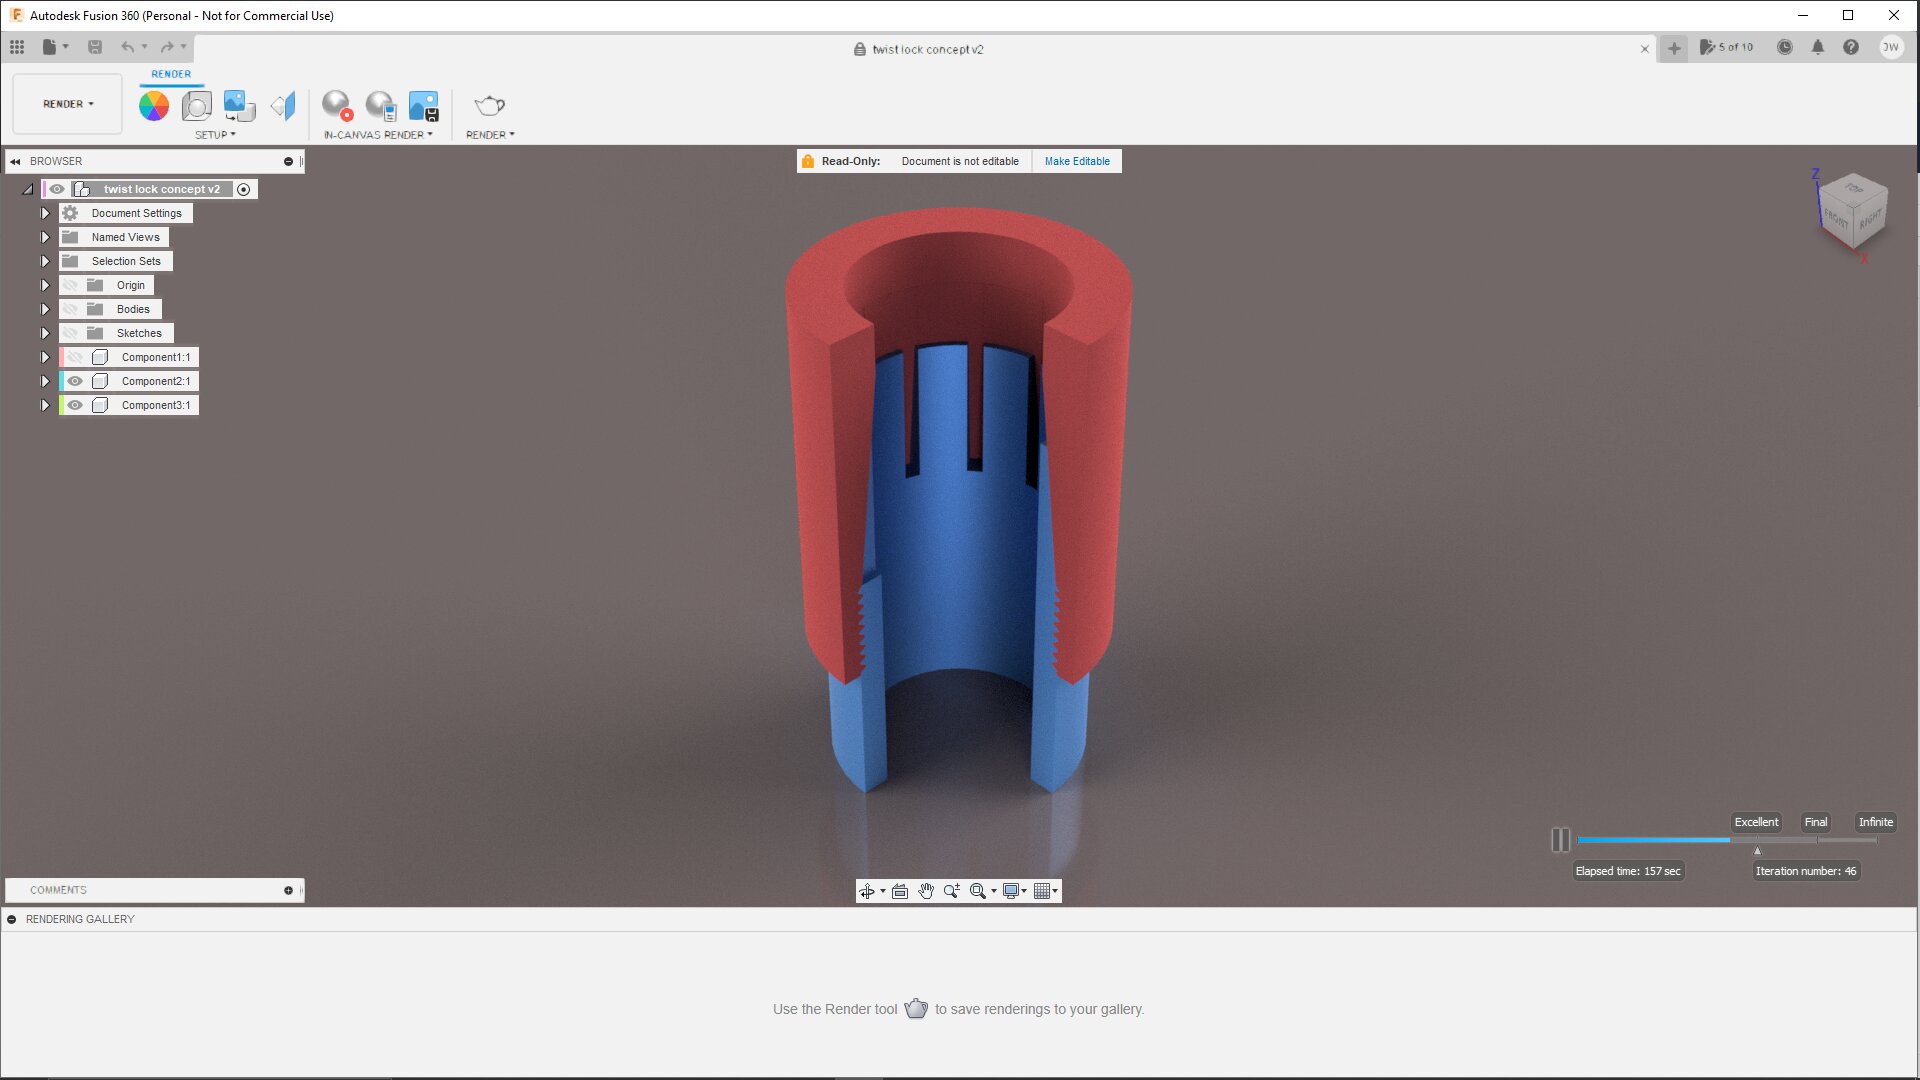
Hey guys, just thought id run through one of my ideas when designing and (eventually) building my hilt.
this concept was born out of the idea that i simply just don’t like using grub screws to secure my blade!
so i came up with this…
it uses 2 O-rings to clamp down on the blade when compressed resulting in a very good lock, no play and no damage to the blade.
i’ve 3d printed this and can confirm that it seems to tick all the boxes! (now thats a first

)
let me know what you think?
5 Likes
This is a really intriguing concept for a blade clamp and I like it!
Biggest issue I see is the threading required up near the blade emitter top in order to clamp down on the blade above the LED or pogo pins. It wouldn’t work on my current saber but it could definitely work on a saber with a larger emitter that you could create the threaded pieces for. I, personally, would love to be able to get away from the grub screw and find alternative methods for securing the blade. I’ve even thought about how someone could machine threading into the polycarb of the blade base and have a matching thread inside the emitter shroud.
Innovation! Woo!
that sound like a great idea, didn’t even think of that one.
you may damage the pogo pins when screwing it in though as the fit would be a rotary motion.
defo a good idea though.
might be a solution like you said for blades with small emitters.
other issue you might come up against would be you might have structural issues with the poly tube as you will have possibly introduce a fracture point from the thread cutting.
just my thoughts and i could be totally wrong… lets hope so as it would give us more options!
i’m still in the R&D phase with mine and potentially the size could be reduce to fit say a 30mm system. it’s currently 50mm from emitter end to pogo pins.
would yours be of the obi design?
i could moch something up for you.
Hey Driftrotor,
this is great it’s similar to the quick disconnect on the US that is a great design for a dual staff coupler.
this could be a great way to secure the blades. my custom might fit this but the ID is 1" and the outer I believe is about 33mm. though i would imagine that it would need to replace the existing emitter right?
Hey afrojedi,
I based this on a standard 1 inch blade from saber armoury.
This is just a concept drawing and can be adapted to suit any blade size.
The only limitation will be the OD of your hilt and the depth that the blade that inserts into the emitter.
So if your a dab hand at drawing and a bit of machine work please feel free to use this and adapt it for your requirements.
Failing that if you can get me the dims of your blade and hilt I can draw something up for you to see if it can be adapted to your saber. Pics would also help.
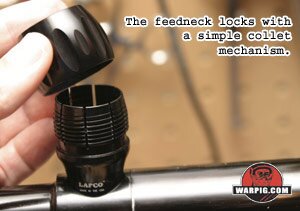
If you ever played paintball, many feednecks use a similar but simpler method:
The Emitter would have two parts:
- The emitter itself, which is fully threaded.
- A “nut” (which would be what’s actually seen).
What you do is the emitter is very thin with a slightly angled thread (say 3deg). And you make some longitudinal cuts (like 2mm wide). Then the nut is also angled in the other direction. As you screw the nut, the lips of the emitter get forced inward and make a hold as strong as a drill chuck. And you get no torsional forces on the blade.
1 Like
ah yes i know exactly what your talking about.
yes a good simple design but hard to make it look nice while being in a small package.
i did run through a few different versions of this but i just didn’t get on with it.
still if it works for anyone else and does what it needs to do, who am i to judge. 
1 Like
I use to use them on Paintball and those holes are 1.01" wide and 1" long. If you use a 20TPI thread you are adding about 0.16" width.
And you don’t even need an angled thread, you can just play with the profile after threading.
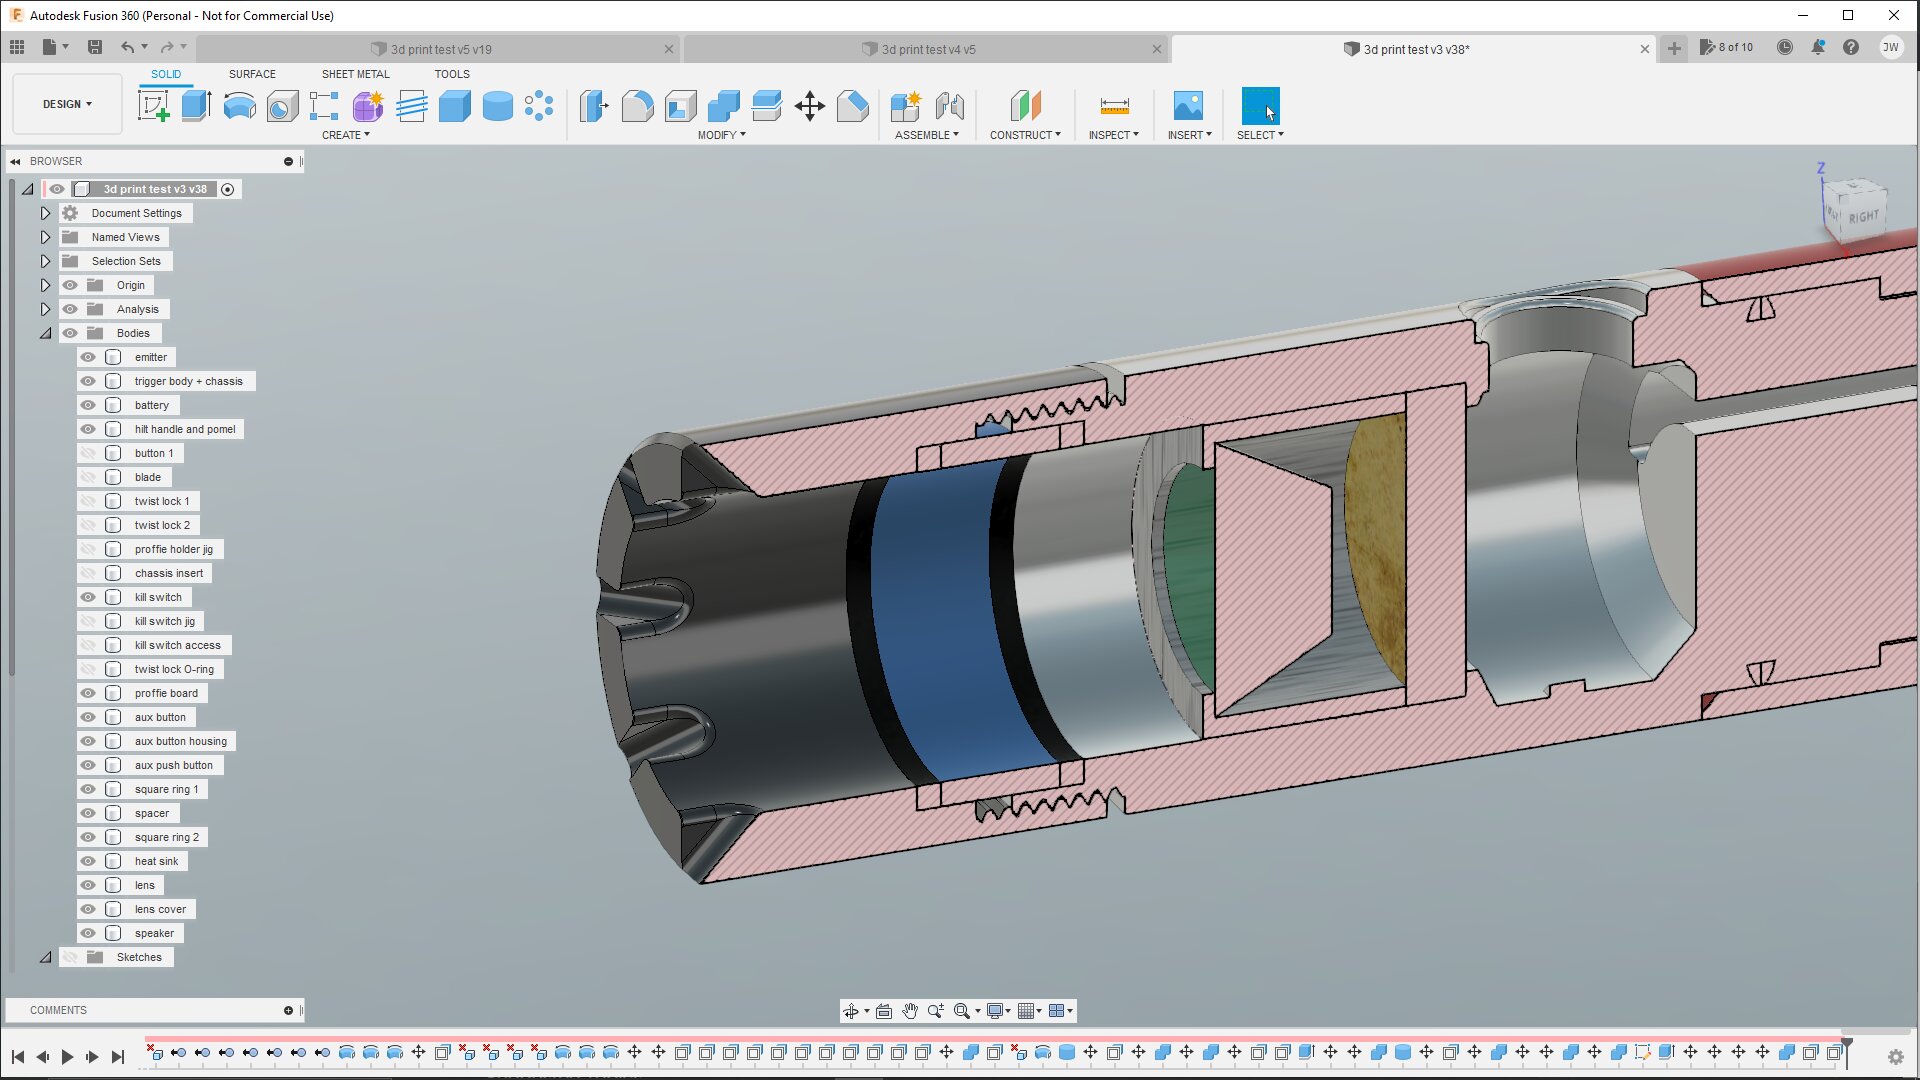
I’ve been doing lots of designing this last day or 2 and I’ve tried to incorporate what others have advised (as they have more experience than me ) and this is what I’ve come up with so far.
it’s still got a way to go before I fully commit to making this and it has been drawn so I can 3d print it and make sure it all works but the fundamental design wont change much.
it will be adjusted to make the most of it from aluminium with internals 3d printed.
Can’t wait to see how this turns out when you get it printed and test fitted.
2 Likes
The question will be… Red? Blue? Or Black?
1 Like
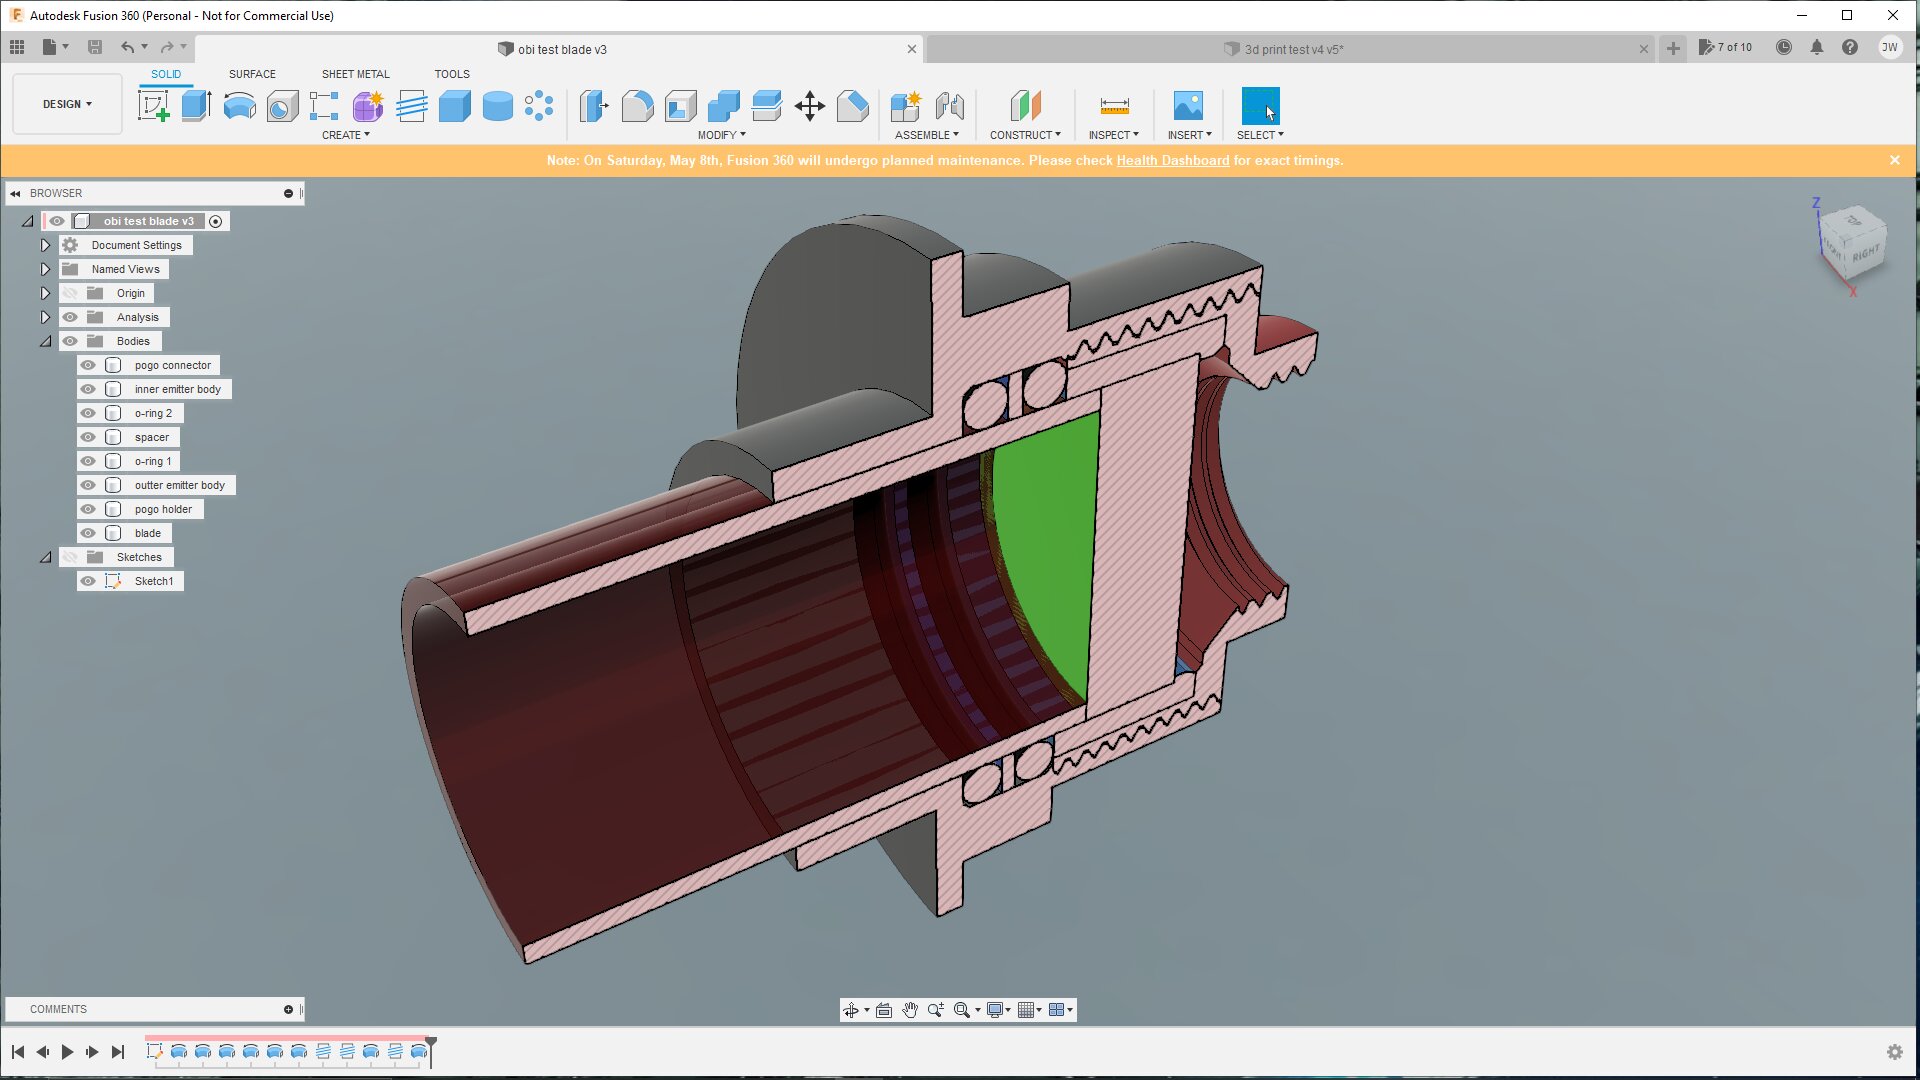
hey Afrojedi,
I fancied having a stab at trying this concept with the original dims from the Obi Wan saber just to see how adaptable it was for a thin neck design. the only part i changed was where the blade inserts into the emitter but apart from that it is true to the original.
design wise it looks good but i don’t know how well it would perform in real life at the blade only engages with the emitter by 22.5mm before contacting with the pogo connector. 
i’m sure if you wanted to make it work adding a little more depth to the emitter it would help lots but for the purists it probably wont work very well.
if anyone has any idea’s on this give me a shout.
Would it be crazy to use the neck threads to tighten the o-rings?
Seems like it could reduce complexity.
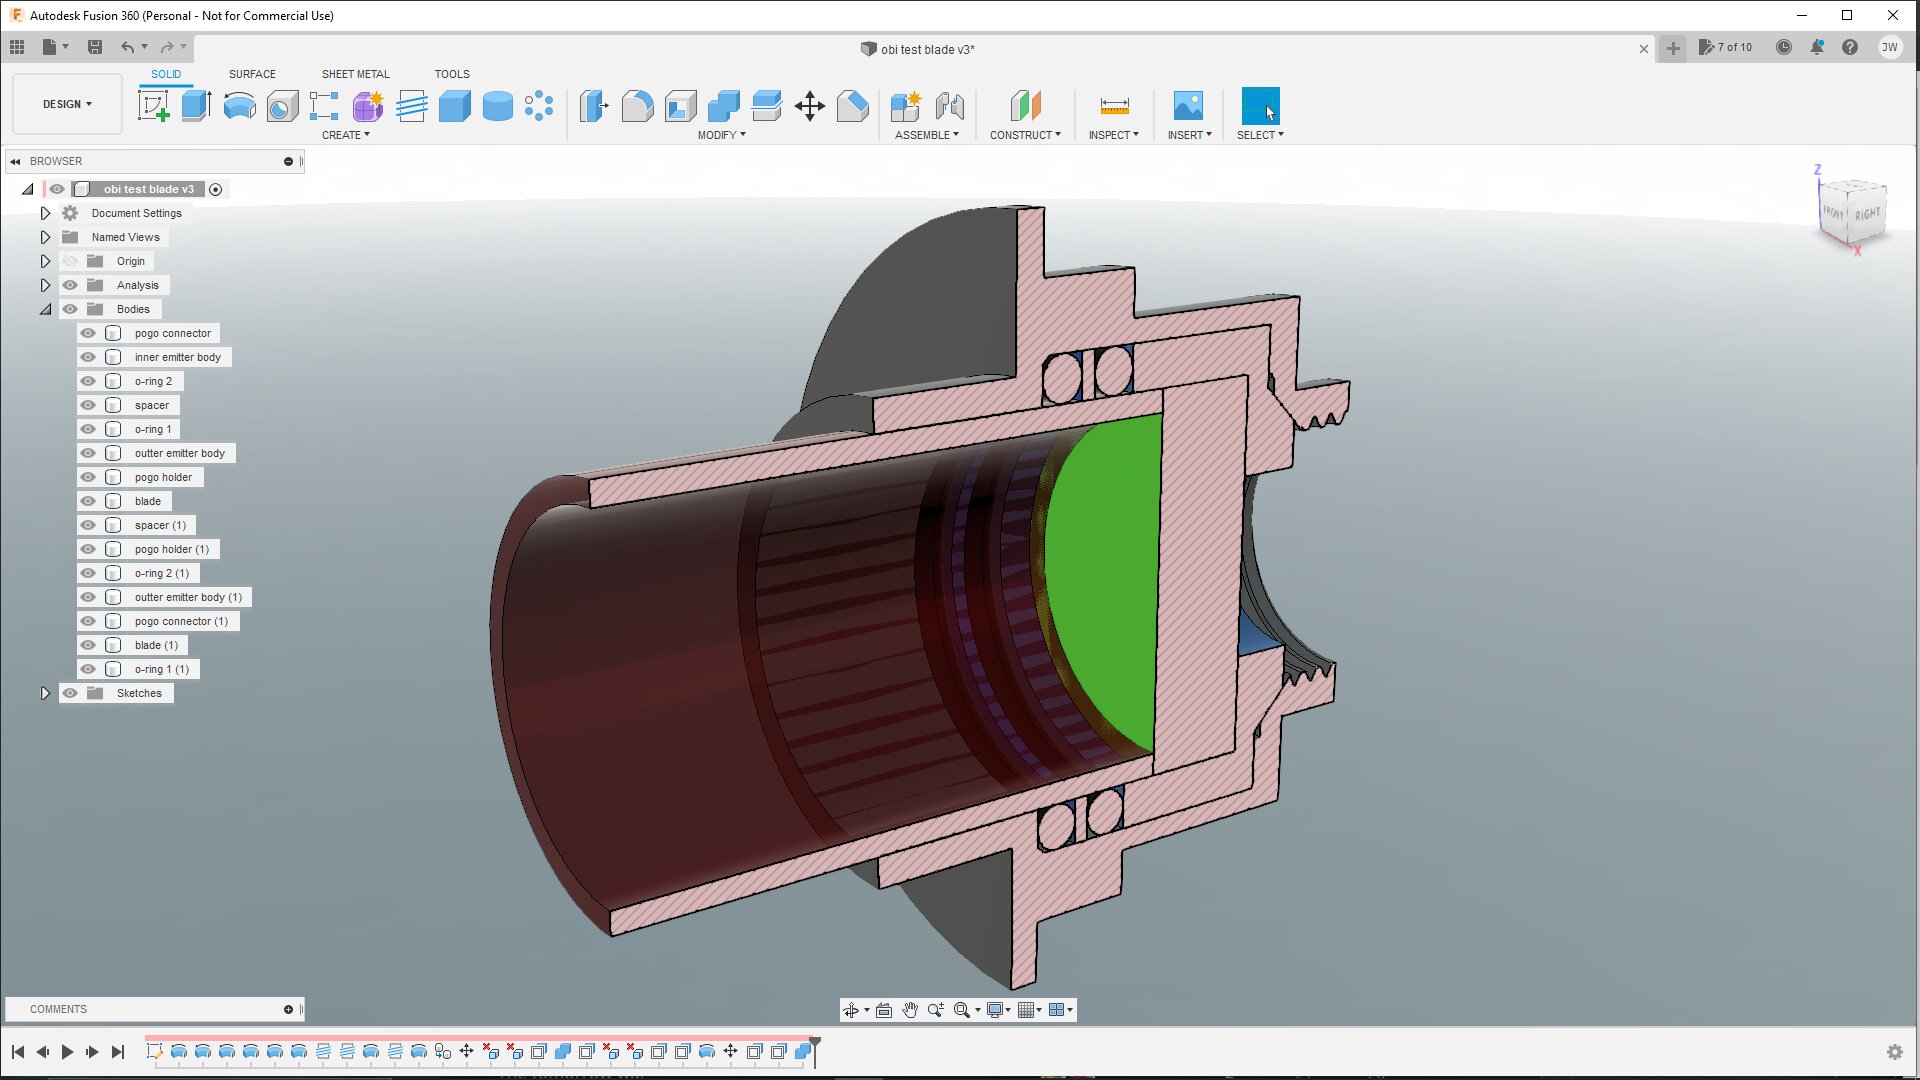
i will have a look at that a see how it pans out.
had a bit of a play and its a little less complicated, although trying to make it work so you can build it seems to be a little more difficult than i first thought. might be less of an issue if 7/8ths blade was used rather than 1 inch.
I’m sure with a few tweaks it could be done.
the main issue is the pogo connector, it takes up quite a bit of room inside and already space limited emitter.
if a different connector type was used then i could allow for more room for the blade to engage more.
blade still only gets 22.5mm engagement which is not ideal.
if you were using the pogo then the emitter section would have to be altered to allow for the extra room.
other thoughts on this arrangement is that the pogo holder is taking the strain to clamp the blade and may result in crushing the pogo board if the holder fails.
a good concept though.
The inside piece seems to be captured though. Not sure if there is a way to make that.
this one is quite a challenge and not just the space but the shape.
not sure I can do much with this without really going to town on it.
it was good fun having a go though and to be fair as much as the first go was a little complicated it could work and would not be hard to assemble.
I might revisit this when I’ve had time to think over it.
1 Like
just testing something out the Proffiezorn added to the forum.
fingers crossed this works.[obi test blade v4.stl|attachment]obi test blade v5.stl (2.1 MB)
1 Like
just a quick update.
i’ve changed the design slightly, the new arrangement will use 2mm square section rings instead of the 3mm o-rings.
I found that over time if the blade is left in the hilt the o-rings are loosing their grip slightly and the blade becomes disconnected from the pogo pins after about 5 mins of spin tricks.
the new idea is based on the fact that there is an increased contact area with the new style of compression lock rings. (should be something close to 4 x the contact area)
other advantages are that it all fits neatly into a 36mm OD hilt.