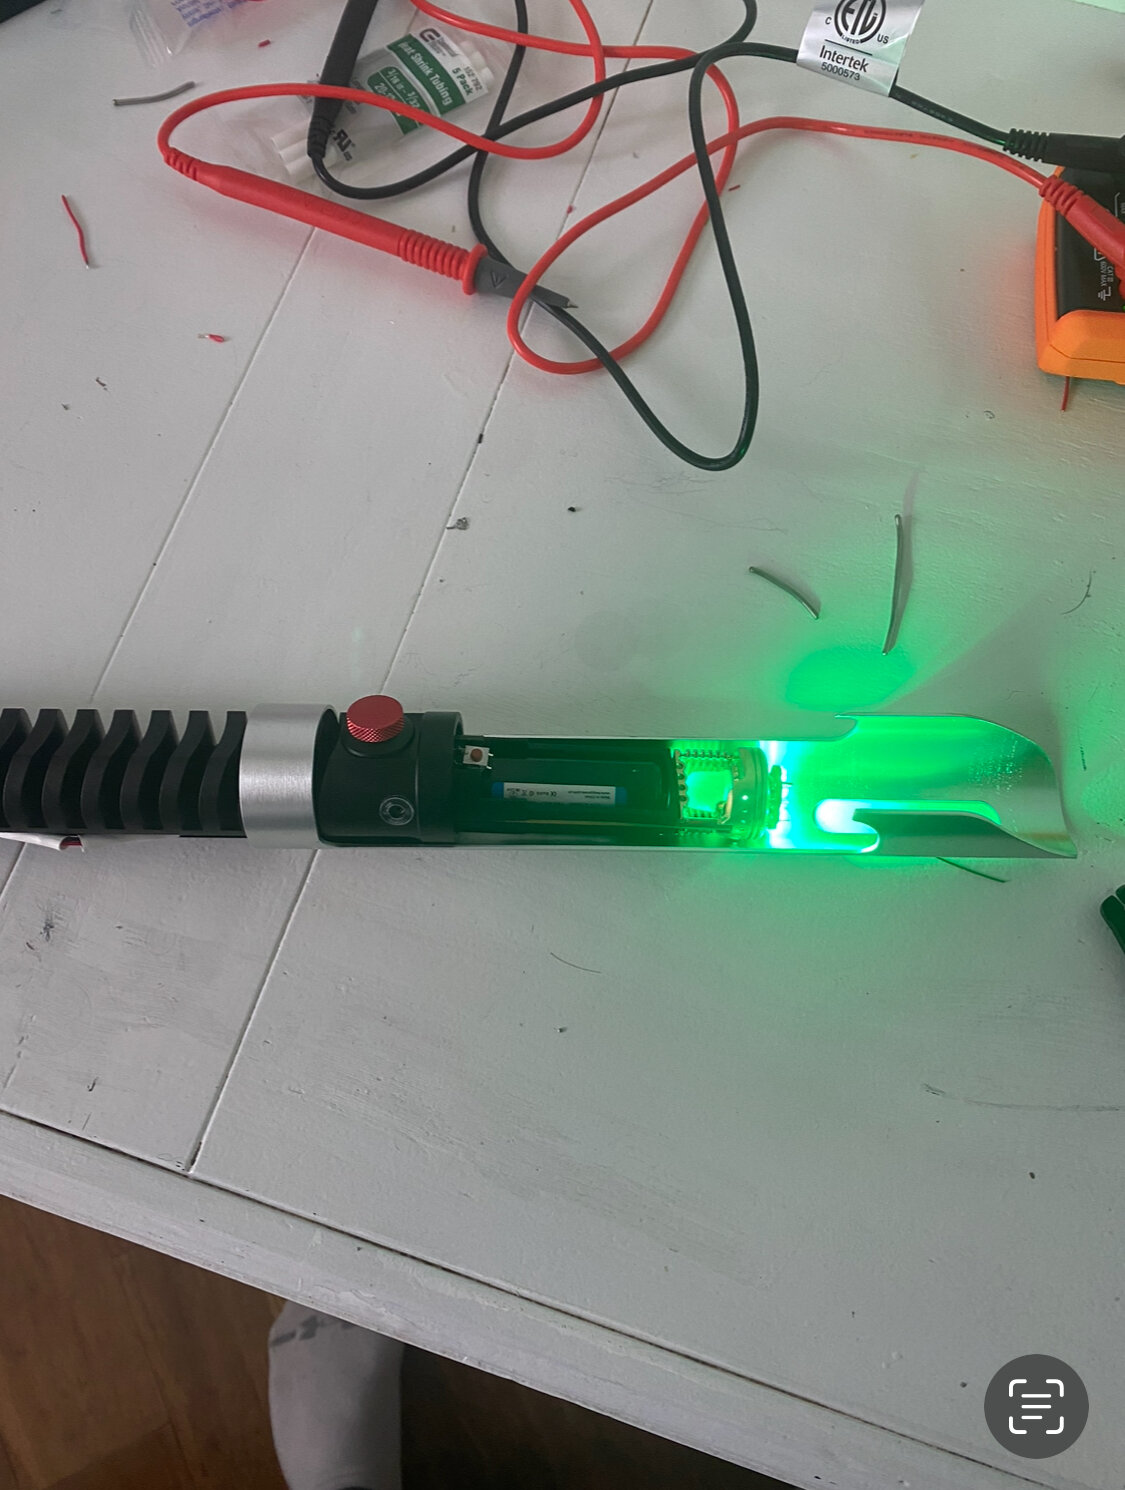
Building my saber… and it went from this…
To this…
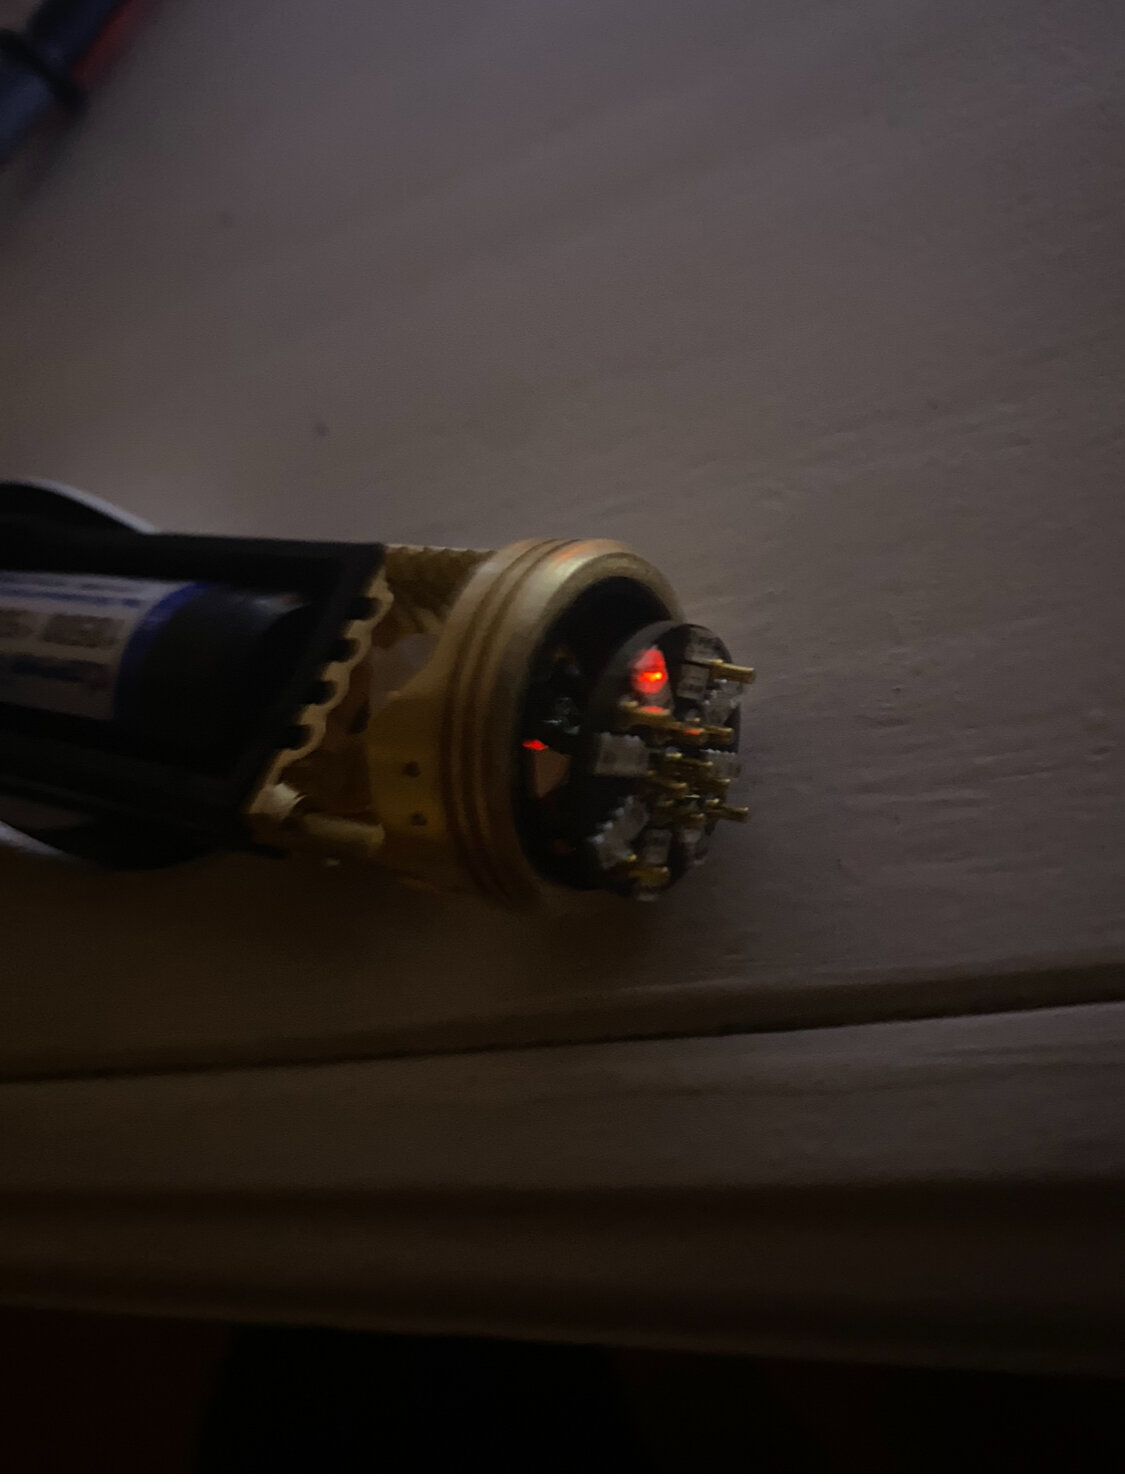
Can anyone tell me what this is?
Background: was testing my speaker by pressing it to the back piece of the chassis, where two prongs make contact with the speaker PCB. I heard audio and it was letting me flip through options so I started hitting buttons. Then something froze up… hit the kill switch and the lights stayed on, so pulled the battery. When I re-inserted the battery, I got what I have now… a single red LED on the PCB.
There’s still a green light on the Proffieboard, but much dimmer than before…
UPDATE - On occasion I have plugged the battery back in, pushed the button a couple times and I’d get one of my fonts (in this case green, prior to that was the rainbow font I think), but after a few seconds it would freeze on the color. Pushing button and flicking kill switch did nothing; only when I pulled the batter the light went off. Then plug the battery back in and get the red light again
A very very dim light on the proffieboard might mean that it’s in bootloader mode. This could happen if the boot button is constantly pressed/stuck.
A common reason for a red light light that is that the data line is doing something, but there is no power. There could be lots of reasons for this, bootloader mode could be one of them.
If the board is in bootloader mode, it should show up as STM32 BOOTLOADER on your computer if you plug in an USB cable.
The light’s no longer dim on the board when I power it on. But what does happen is that the red light on the PCB comes on the moment I put in the battery (even if power off). Then when I push the button to activate the light, the font comes on and flickers as normal for a few seconds, then freezes.
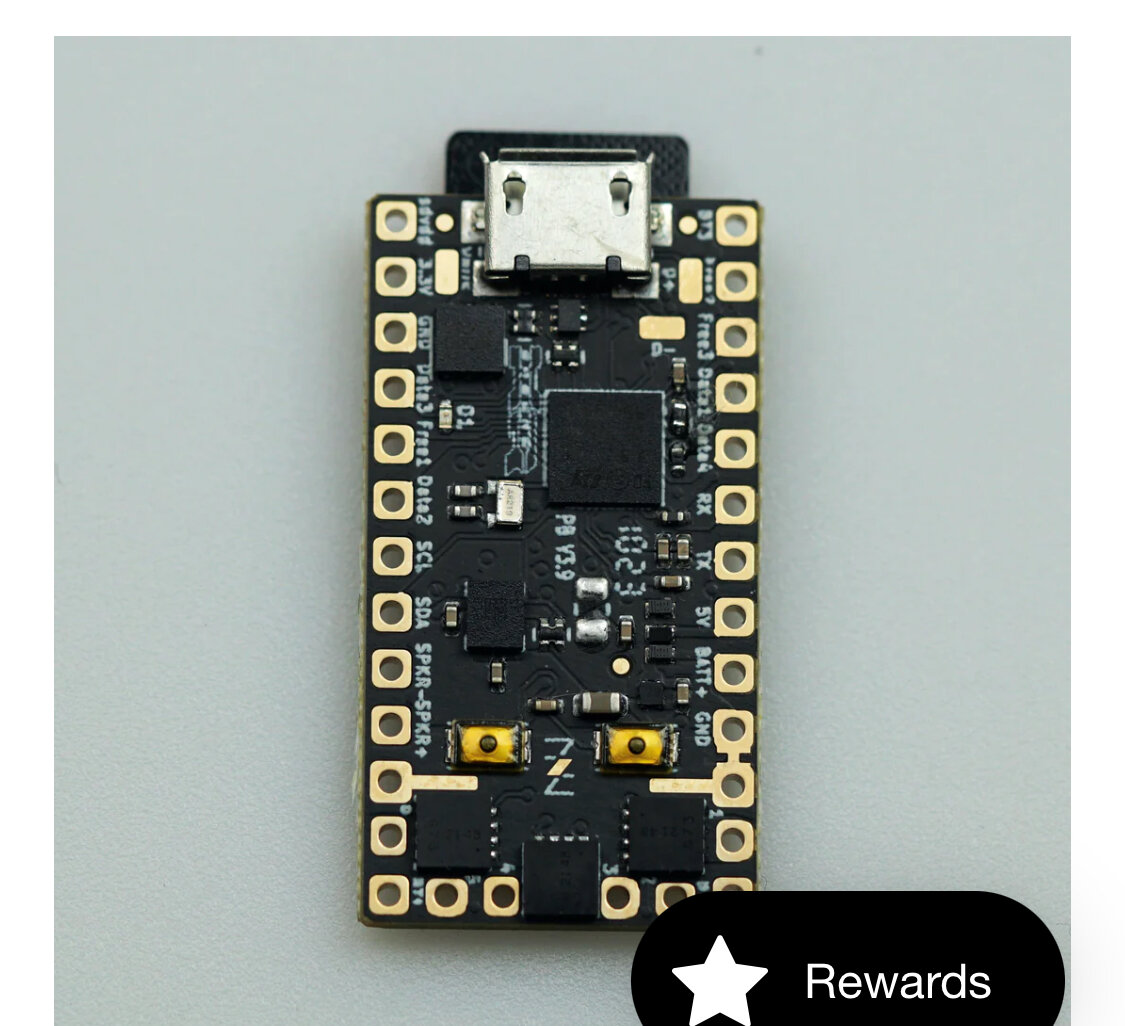
Another thing I notice is that the board gets hot very quickly, when I power it on or when I connect it to my laptop.
What’s odd about that to me is that there is power, if the light’s on the board and the PCB is activating albeit briefly.
If any of what I said above might clue in to what I should check, please let me know 
That is bad.
Hot indicates that power is flowing freely somewhere it’s not supposed to, meaning a short. If you’re lucky, the short is something you can fix. Maybe the board is touching the chassis in an inappropriate way, or maybe your wires have goose necks that are touching, or maybe there is some solder on the board or something…
Sometimes, shorts cause damage inside the chips on the board, and those things are not possible to fix without replacing the chips.
Fantastic… may be solder on the board issue. I connected battery + on the wrong side thinking it was the only way to route to the board. Then when I tried to go under the board I couldn’t poke the wire through to solder from the top, so I did a small touch on the bottom to merge it with what was left over on the top.
Not sure if that’s the issue though because it seemed to be working fine when I turned it on. Maybe coincidence, but the short happened as I was connecting the speaker to test the sound
Can you tell what part of the board gets hot?
It’s the large square that has 1023 written right under it (and Data4 to the right of it).
Yeah, that’s the main CPU, it should not be getting hot.
There is still a possibility that there is a short that can be resolved which will fix the problem, but I think there is a fairly high chance that the board is toast unfortunately.
Well I just ordered a new board from KR Sabers. At least Black Friday deal is still on 
Is there maybe some things that can be noted to watch out for to avoid frying another board? I wish I knew what the error was so I can be sure not to repeat it.
It happened right after I installed the kill switch and and speaker wires, then it blew when I just tried to squeeze the speaker to the connector and test the audio…
Well, lining up pogo pins manually is one of the nonos of saber building.
However, shorting the speaker pins should not cause this particular problem, it would seem that something else caused it…
Actually on that note, an important detail I didn’t think to mention was that when I got the PCB to light up, I attempted to manually press the blade against it to see if it lit the blade. It did at first, but of course with my unsteady hands, sparks came off the PCB and yes… a bit of smoke off the board…
It was definitely an ‘oh sh*t’ moment, but reason I didn’t mention was that things still seemed to be working afterwards. Was maybe a few hours later I was still working on it without issue (granted it wasn’t powered up the entire time). But maybe I already signed its death warrant at that point and it was just a matter of time… and the contact with the speaker pins was the final straw (or maybe it was coincidental).
I had half a mind to email Khal again and ask to add a third Proffieboard to my order, since I wasn’t sure I’d fry it again not knowing the cause. But on that note, I think I can take my chances and just be sure to not repeat that particular ‘step’ again.
Sparks and smoke are obvously not a good thing, but it depends a lot on what is sparking and smoking how bad it is. The FET section of the proffieboard is built to tolerate some serous power, and when problem occur on that end, it’s often something else that ends up melting…
I’m not sure which of these two incidents is the culprit here, or maybe some third thing. Either way, here are some general advice before trying again:
- Do not line up pogo pins manually. If you need something temporary, get a plastic tube with the right inner diameter and use that.
- Check for shorts. Double-check, triple-check. (First inspect manually, then test with multimeter.)
- Beware of goose-necks. This happens when you use regular plastic-insulated wires. The plastic shrinks while you’re soldering, which leaves a section of the wire exposed. If this exposed section is long enough to reach other pads, it can cause shorts when squishing the board into place.
- Don’t assume boards and wires won’t touch the inside of the saber or other metal parts. Use capton tape or some other insulator to make sure.
Well I already fried a board so I might as well ask my dumb questions 
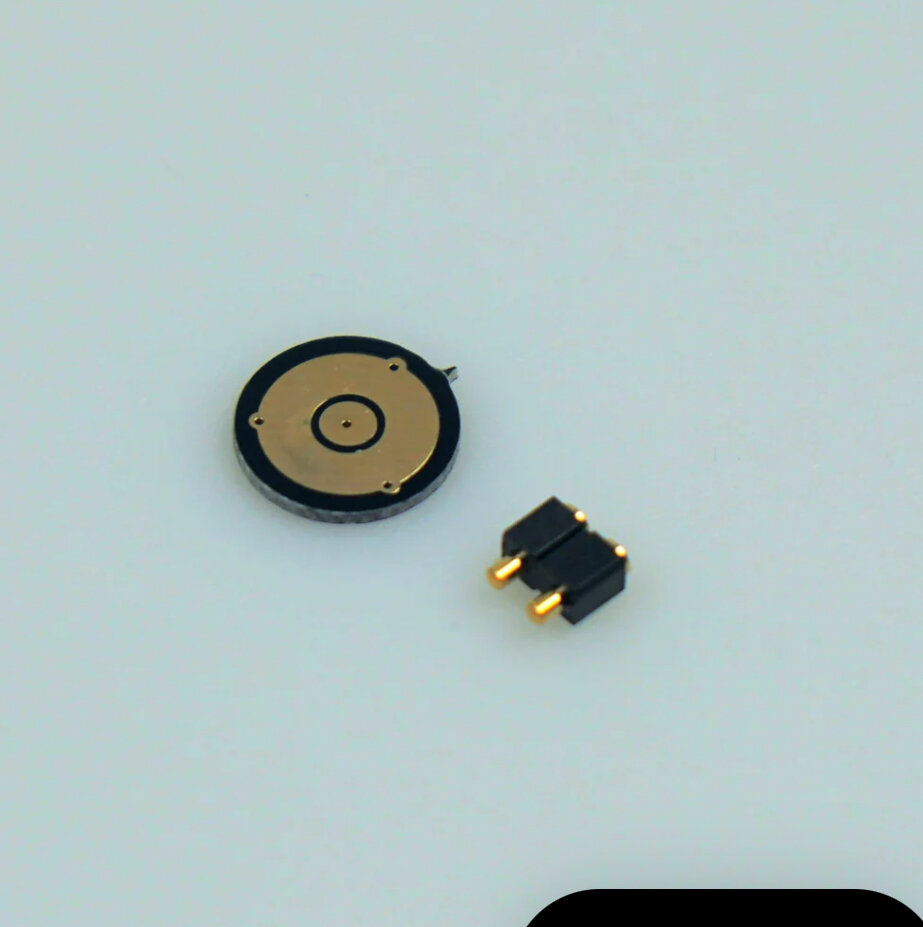
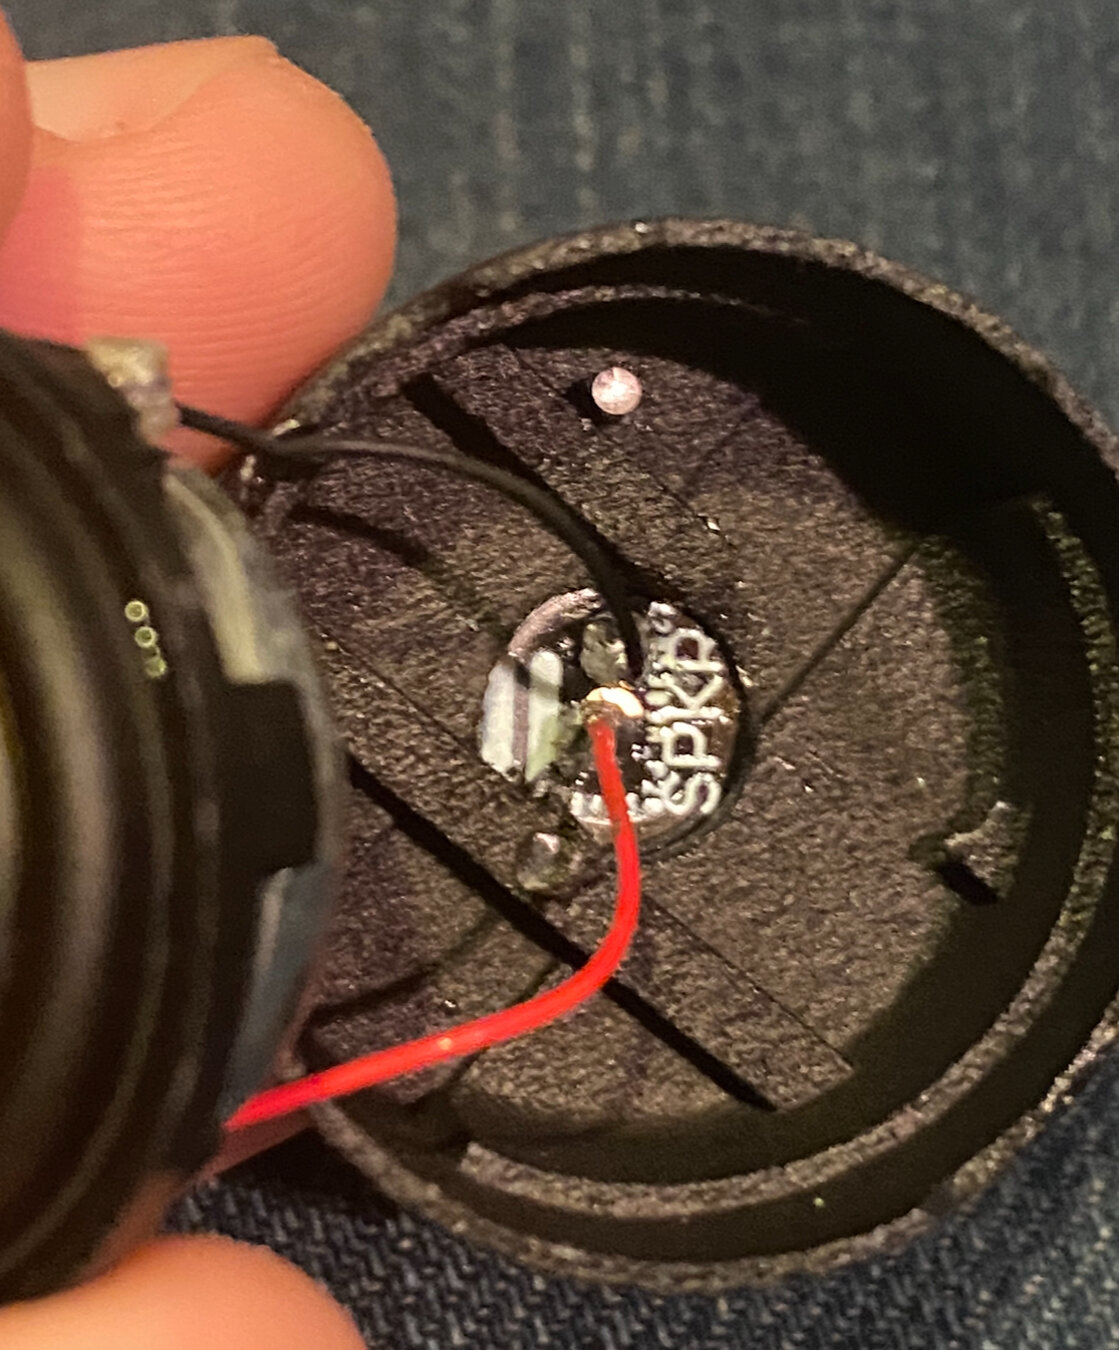
I definitely won’t do that again for the PCB to the blade, but should it be ok to test the speakers by manually pressing the prongs to the PCB connected to the speaker? To clarify it looks like below:
If the NPXL PCB lights, that’s enough to tell me it’s good, but not sure how best to check if I’m getting sound before I glue everything down. If I shouldn’t try pressing them together where they would otherwise connect securely together within the hilt, what’s the best way to confirm my sound is working?
Also, I’m wondering if the solder points on the speaker PCB are close together and risking shorting, should these have heat shrink over them?
The speaker pads do have a bunch of protection on them that makes this sort of thing a lot safer than blade PCB shorts. However, I would not recommend disconnecting a speaker while sound is playing. There is enough coils in a speaker to potentially act as a spark generator, and when that happens, the amplifier is likely to die. Sparking can only happen if the speaker coil is active when the disconnect occurs though.
It’s still safer to put things together in a tube, or in the chassis to test things though. Even with all that protection, amplifiers have been known to die from shorts.
It’s hard to say from the picture if the speaker wires are a problem or not. If you think they could possibly touch when squished, then you should fix it. I don’t think heat shrink is the solution though, it’s probably easier to just re-solder the wire so that the red and the black stick out in different directions, and thus cannot touch.
1 Like
Page six onwards of this might help:
1 Like