Ahoy (hopefully) new friends! I’ll start with the obligatory “if this isn’t the right place for this, i apologize, it seemed right to me, but I’ve been wrong before” statement. With that out of the way, a few weeks ago i decided to take on a new project, and through much pain and research found myself here asking for help from some experienced bladesmiths.
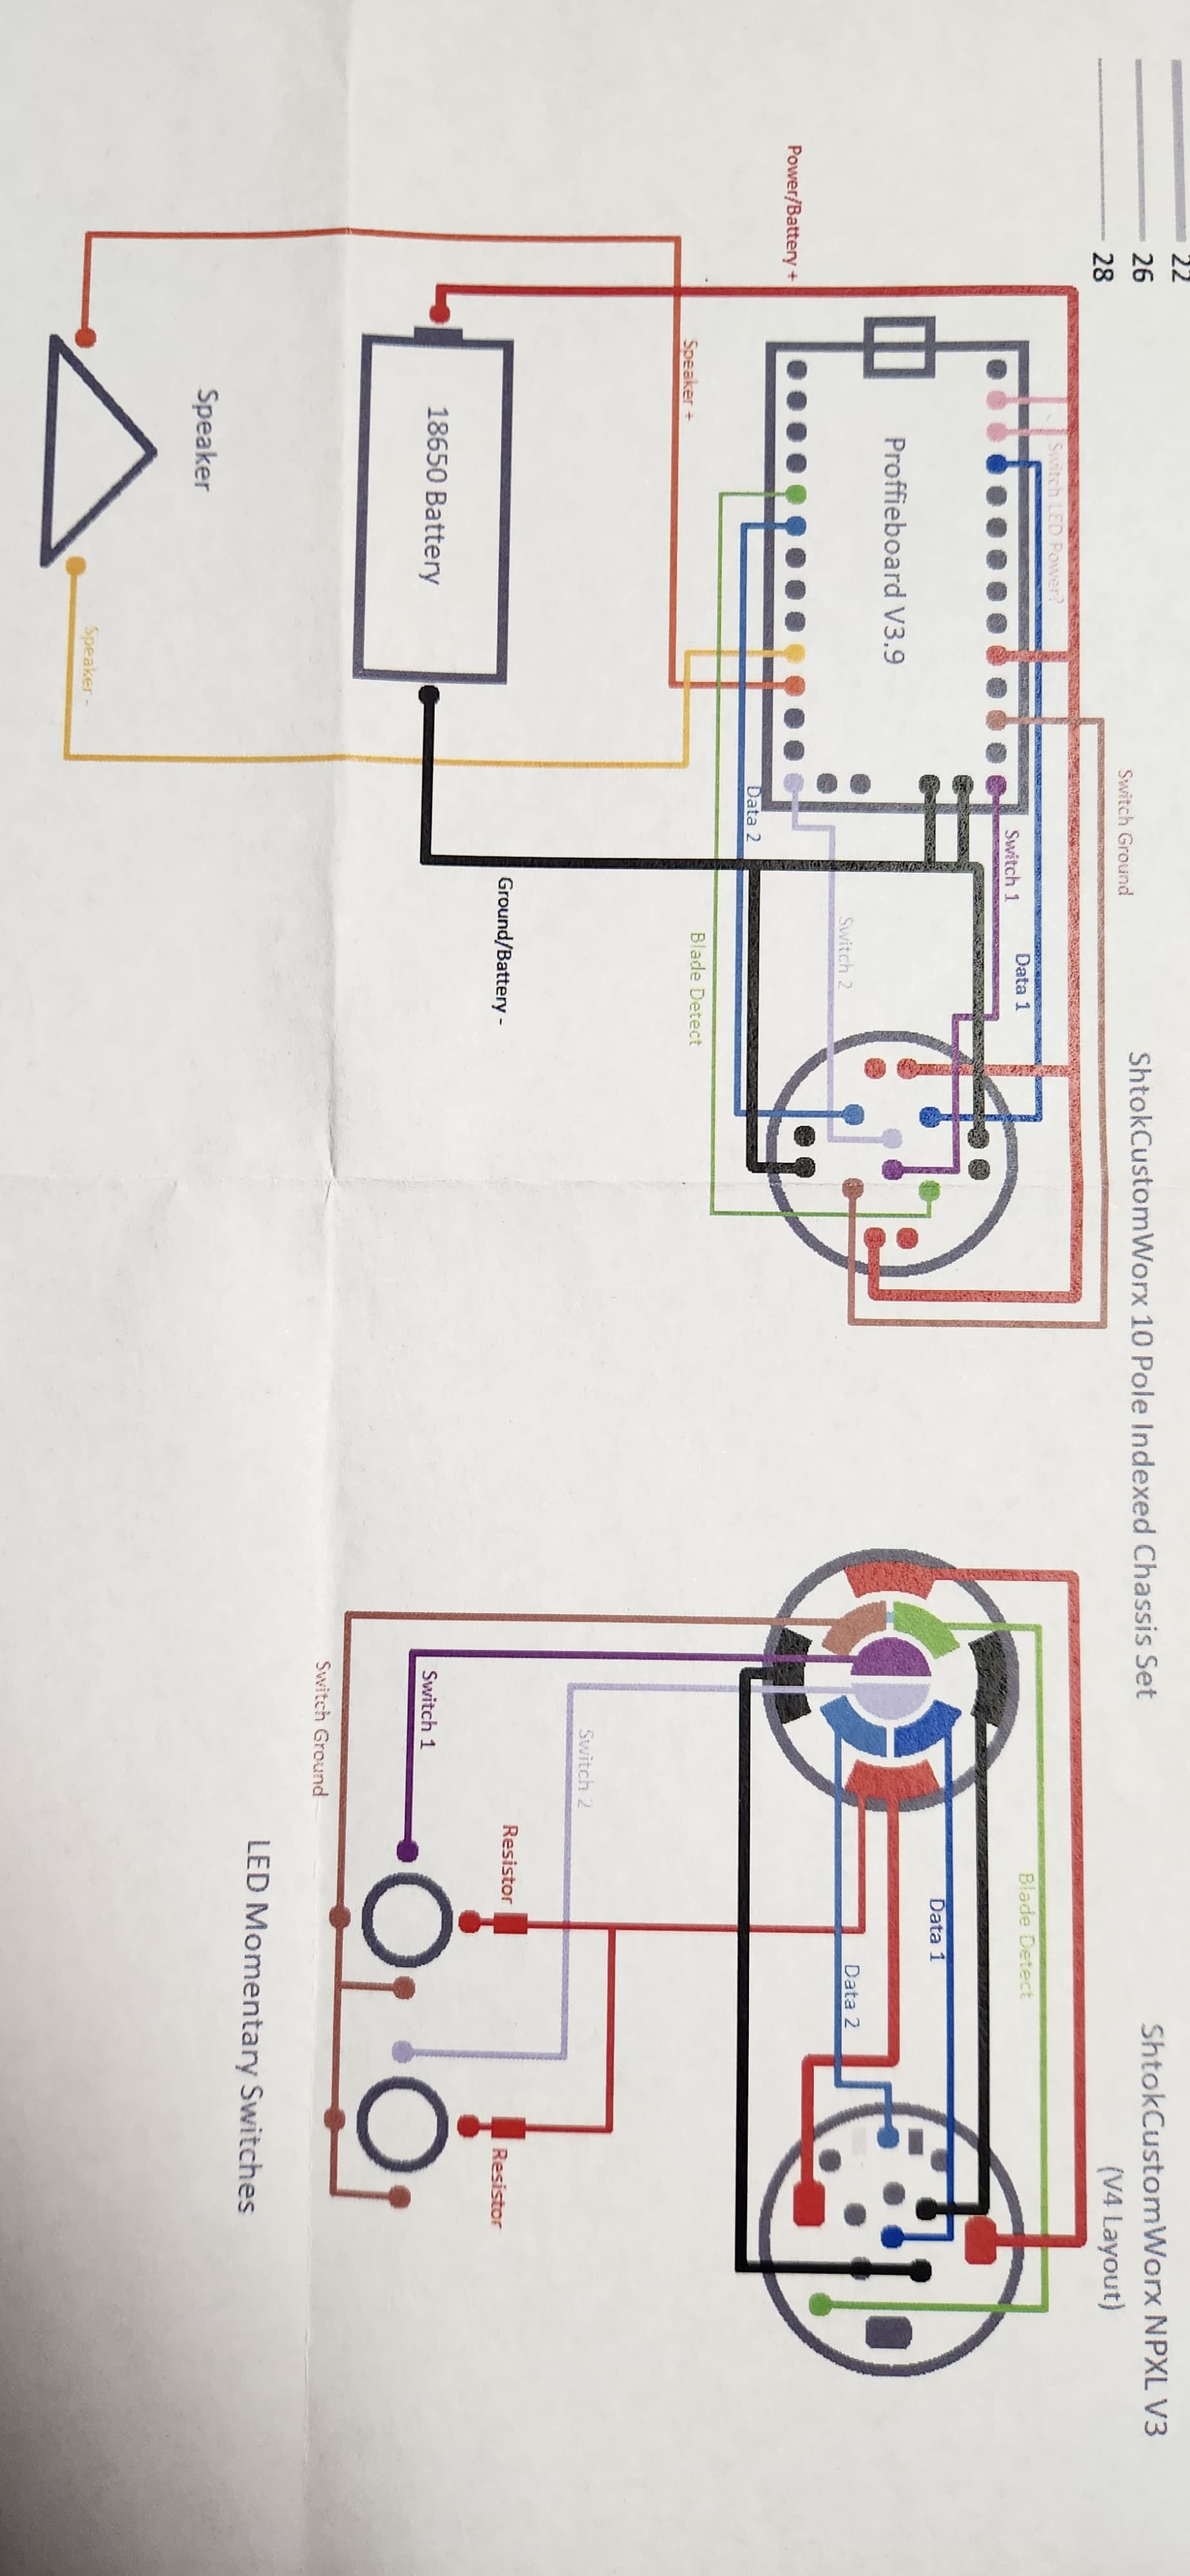
Being a glutton for punishment, I opted to do my first build with a 2-switch, neopixel blade with detect and ID on a proffie 3.9 setup (because i have bad ideas to build on). While waiting for the last of my parts to arrive i decided to sit down and map out my internsls. I feel like I’m getting the gist of what I’m looking at, but this is more ambitious that any of my previous hobby projects, so i wanted to make sure I’m doing things right. My main questions are 1) Does this diagram look mostly right to you folks that have been doing this longer than me? 2) I’m hitting a self-imposed research loop between the proffie and NPXL manuals regarding the blade id and detect resistors hilt-side. I’ve got a Bendu Armory BTF blade, and fun my understanding it has the basic data resistors installed blade-side, but haven’t been able to determine if that includes the ID resistor, so I’ve been planning based on it not being there and i want to make sure i understand. In that situation, i just need a 100 kOhm resistor to jump the Data 1 and BP pads and a signal line connecting the BP pad to the blade detection pin on the proffie?
Sorry for the long first post. I get verbose when I’m excited, and been on the cusp of actually starting assembly has me very excited.
Thanks in advance for any advice, and i hope to stick around for a while.
No.
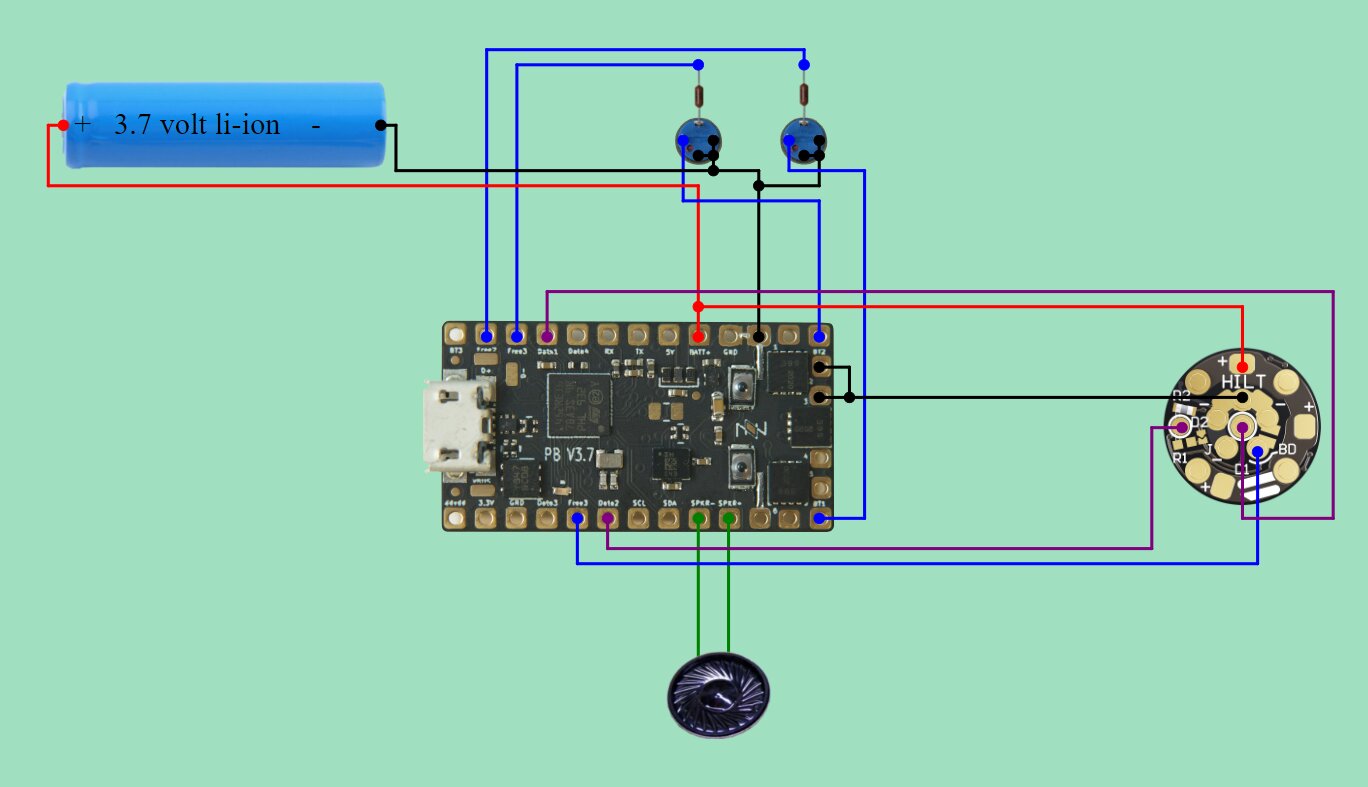
You have the LED2/3 pads connected to battery negative, which is not correct.
I can’t tell where the pink wires are going.
It’s confusing because there are two resistors.
One in-line to protect against shorts and stuff, and one between GND and data for blade ID.
The whole point of blade ID is to identify the blade, and that won’t work unless the ID is in the blade. (Unless you’re trying to do something else with blade ID.)
Thank you for the info. After diving a bit deeper into the documentation, it makes a bit more sense and I feel like the Blade ID isn’t as useful if you don’t have multiple blades to swap around, in which case it’s a feature I can do without for a while. And it looks like i overlooked this in my plans.
It looks like the 2 pads outlined in red are there to connect the BD pad to the negative pads with one small trace and loop back on itself. If that’s the case, then wouldn’t connecting those pads be the same as bridging it to GND? I could very easily be mistaken on all of the above. Also, what does bridging those connections on both PCB’s do?
And relating to the first part (the LED’s to ground and pink wires), my sketch was based on this diagram when I was using the configurator and a couple other diagrams I ran across during planning:
So I should be okay if I run the negative wires from the chassis PCB to the GND pad next to BATT+ (or any actual ground), right?
And I wasn’t sure if I actually needed the pink wires (potentially connected to + power wire), since they appear to control/power the switch LED’s, and I don’t see a way to connect specific pads to the switch LED’s through the chassis PCB’s.
Unfortunately it’s very difficult for me to answer these questions.
It’s all partial diagrams, and I’m not particularly familiar with the chassis PCBs you are using.
I’m guessing that these are used to detect when the chassis is inserted or not.
(Which is similar, but different from detecting when the blade is inserted.)
I think you want the “-” pads to connect to the LED2/3 pads, and the GND pad(s) can be connected to the GND pad on the proffieboard. (Or BATT-)
No worries, you’ve been a huge help as is. Your explanations have been understandable and i feel like i have a much better idea about what I’m doing now. This is much more daunting than i had originally expected, but I’m enjoying it and looking forward to seeing everything come together. Thanks again!