This is a good starting point. No need to even model these parts xD, the major work will be to have a good shading, lighting and realistic render, the soft is appropriate about that.
We can imagine having several layers:
- background chamber themes (clear metal, copper, different “architectures”…)
- middle layer for crystal (potentially different kyber shapes)
- foreground for the crystal socket/tongs and potential door/grid or other decoration in front of the kyber (maybe split in 2 layers to chose different socket and door)
- potentially additional layers for effects / glow
These layers would be merged by a script to output a final set depending the selected layer options.
I’ll first make some animation tests I’ll submit you.
ProffieOS is also able to do layered rendering, and it’s my intention to use that to show a battery bar, and some of the effects. Semi-transparent pixels are expensive though, so we don’t want render too many layers at runtime. But I think having one layer for glow, lighting and other effects which can be independent of the crystal rotation could work fairly well. These effects would then be triggered by clash, lockup or other events on the saber.
Either way, I definitely looking forwards to seeing what it will look like. 
1 Like
Maybe we can integrate the battery level inside the chamber theme, it’s a nice feature.
It makes me want to integrate it into my project 
I’m building my saber in parallel, but I hope to show you a first try this weekend.
1 Like
Subsidiary question: the display will be mounted horizontally or vertically ?
With the 2:1 or 1:2 aspect ratio, the appearance will differ significantly. On the one hand we can show completely the cristal, one the other hand it will be truncated at the top and bottom like in a window.
The display would be mounted so that the the longer edge aligns with the saber. It’s too big to mount the other way. So I guess that means horizontally? (Assuming the saber is also horizontal…)
I’m not sure if we would scale things down to fit the window, or if it would look better to make it so that you can only see part of the crystal through the “window”. Either way, It’s probably best to just render things bigger than required and then scale and crop afterwards, right?
Okay, I prefer ask because in my build I’m able to put it perpendicularly (1"+ diameter available in the chamber zone).
Yes there is still a window style but well less cropped than a perpendicular cut view.
Since the display is ~1" wide, you would have to put it near the center of the cylinder to fit. While that could be kind of cool, because then you could have an actual window that shows the virtual crystal inside, that’s not really what I was thinking. I think most people will will want to mount the display next to the battery or proffieboard and sort of give the illusion of having space for a crystal chamber in a build that doesn’t normally have enough space for it.
So the display would be mounted close to the “surface” of the cylinder to make space for other things underneath, at least in most cases.
That said, this whole exercise is just a proof-of-concept, people may want to use different size displays and display different things on them. My scripts and your images is just a way to show how it’s done, and then hopefully other people will learn from it and do whatever they want.
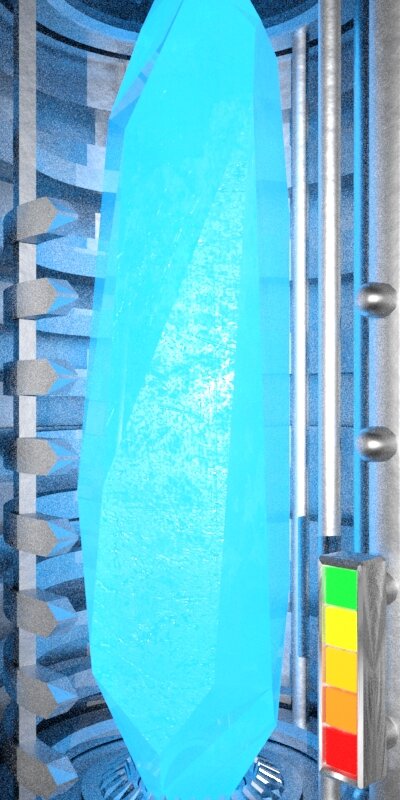
First try. Draft render (this is why it’s noisy). No blur/particles effects.

Video sample here (youtube low quality)
https://www.youtube.com/watch?v=165HU62ZTSk
Maybe just use the kyber color for battery level, standard colors breaks a bit the design ^^
2 Likes
That is pretty awesome already
I agree that the battery level colors looks a bit out of place, but I’m not sure how to fix it exactly.
Maybe make it a glass tube with something glowing inside? Ultimately, the battery meter is going to need to go on it’s own alpha-blended layer, but that still works for almost anything that’s in the foreground I think.
Also, I’d like to make the rendering window a bit bigger, like maybe add 15% margin all around the image. While it wouldn’t be needed for this particular display, it would make cropping to other display sizes much easier.
Good point for the tube, maybe a kind of Nixie tube, I’ll make a test.
Ok for next renderings I’ll do a 3:4 format and move back a bit the camera, it will allow to cut the window format we want.
Last tries
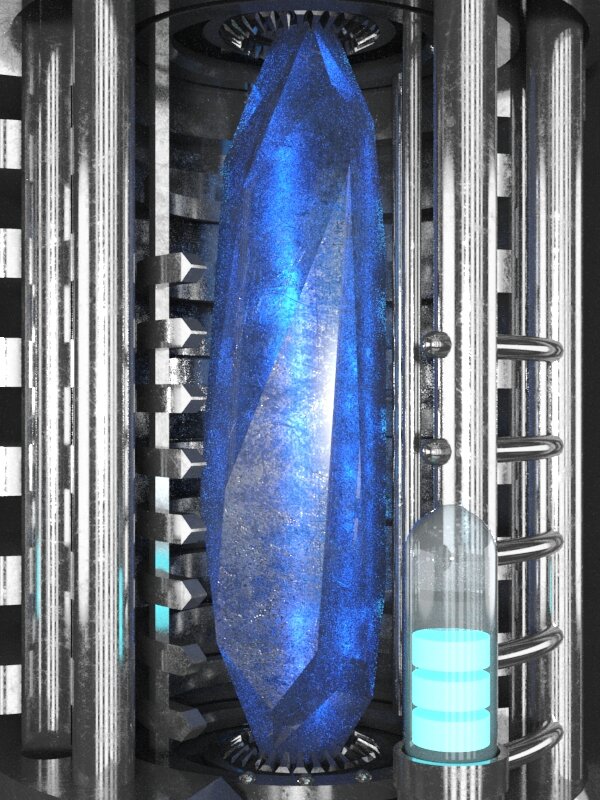
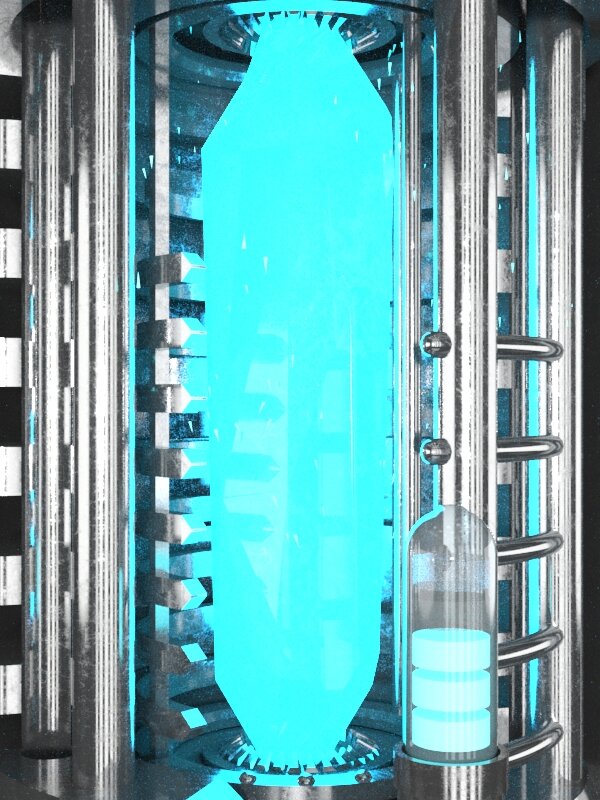
The tube style is better.
I wonder if a holo style could be even better. This is closer of the lore and can open the door to a global interface for anything you may implement in the future, such as volume display/control, preset or edit mode menu…
Next time I’ll try to render things separately and play with compositing to see how use that the better way. Plus adding FX (blur, sparks…)
This is looking really cool
@Cairon59 is it a lot of manual work to render a set of images, or is it easy once it’s configured? I was hoping that you could render a set of images that I can use to start working on the scripts for converting these into files that ProffieOS can read. However, if rendering the images is a lot of extra work, then it’s probably better to wait until the end to do that part.
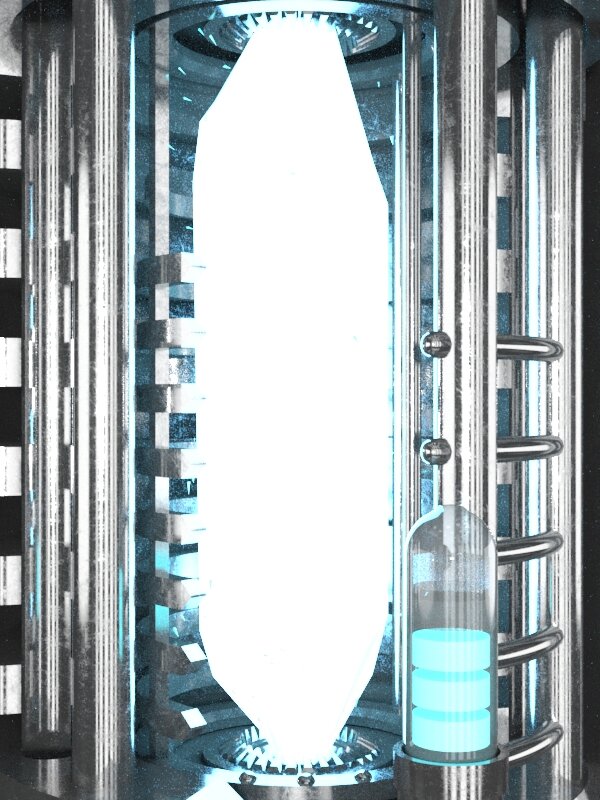
It will be a fair number of images though, because we’ll need N images for a full rotation of the crystal, then another set of N/2 or N/3 images where the saber is on, so the crystal is brighter and rotating faster and then maybe a third set which also rotates at the higher speed, but which has white light, or lightening effects added, which would be used for clash/drag/lockup.
Finally, we’d want all of these with red, green and blue crystals for blending into any color.
So if N is 60, the total would be 3 * (N + N/3 + N/3) = 5N = 300 images.
(N=60 might be overkill though.)
The configuration part is easy, I set the crystal diffuse/emit color map I want (r, g or b and amount), then launch the rendering for N images, the crystal is prepared to make à 360°.
The render part is the longest, I have an old CPU ^^': the latest test takes ~6h for 200 images at 60fps in 300x400.
I think one set of images is enough to manage speed, just remove 1 every 2 or 3 images to x2 or x1,5 speed.
In this case, all sets of 60 images in 300x400 = (R + G + B) x (normal + bright) x 60 = 360 images of pure rendering and about 6 sessions of 2h.
The clash effects will be done without rendering, with FX tools like After Effect using a sample or alpha part of a rendering. As it’s white, it works for all colors (or not ?). Add some images of that and maybe other effects.
I’ll can give you some sets in the following 2-3 days.
How do you want to work to share assets ? Cloud storage, github ?
Any way that works for you. Email, github, google drive, email, whatever.
Eventually I want to put all of this stuff up on github somewhere so that people can download the script and images and generate final files in any size or color, or mess with the images to do whatever they want. If we want to get started on that I could just create a new repository and you could upload the images there?
I created:
These images would go in virtual_crystal_chamber/images/
1 Like
Perfect, I’ll push on it.
Just forked and push the first sets.
Don’t hesitate to let your feedback, needs, anything else…
Ok, so I wrote a script that blends, scales, crops and converts the output into PQF:
As you can see, this is purple, so, 50% red and 50% blue.
It’s supposed to light up when I turn the saber on, but it doesn’t do that yet, so that’s my next thing to fix.
7 Likes