Maybe this will be the next innovation to become standardised like Neopixel or smoothswing!
2 Likes
Alright, when I get off work I’ll try some felt or wadding to see if that makes a difference with the sound and will post a video of the results.
1 Like
Thanks! I’ll make a new topic of the test rig with a parts list and some pictures. It’s all from ebay and scrap odds and ends…maybe $20 worth of stuff.
1 Like
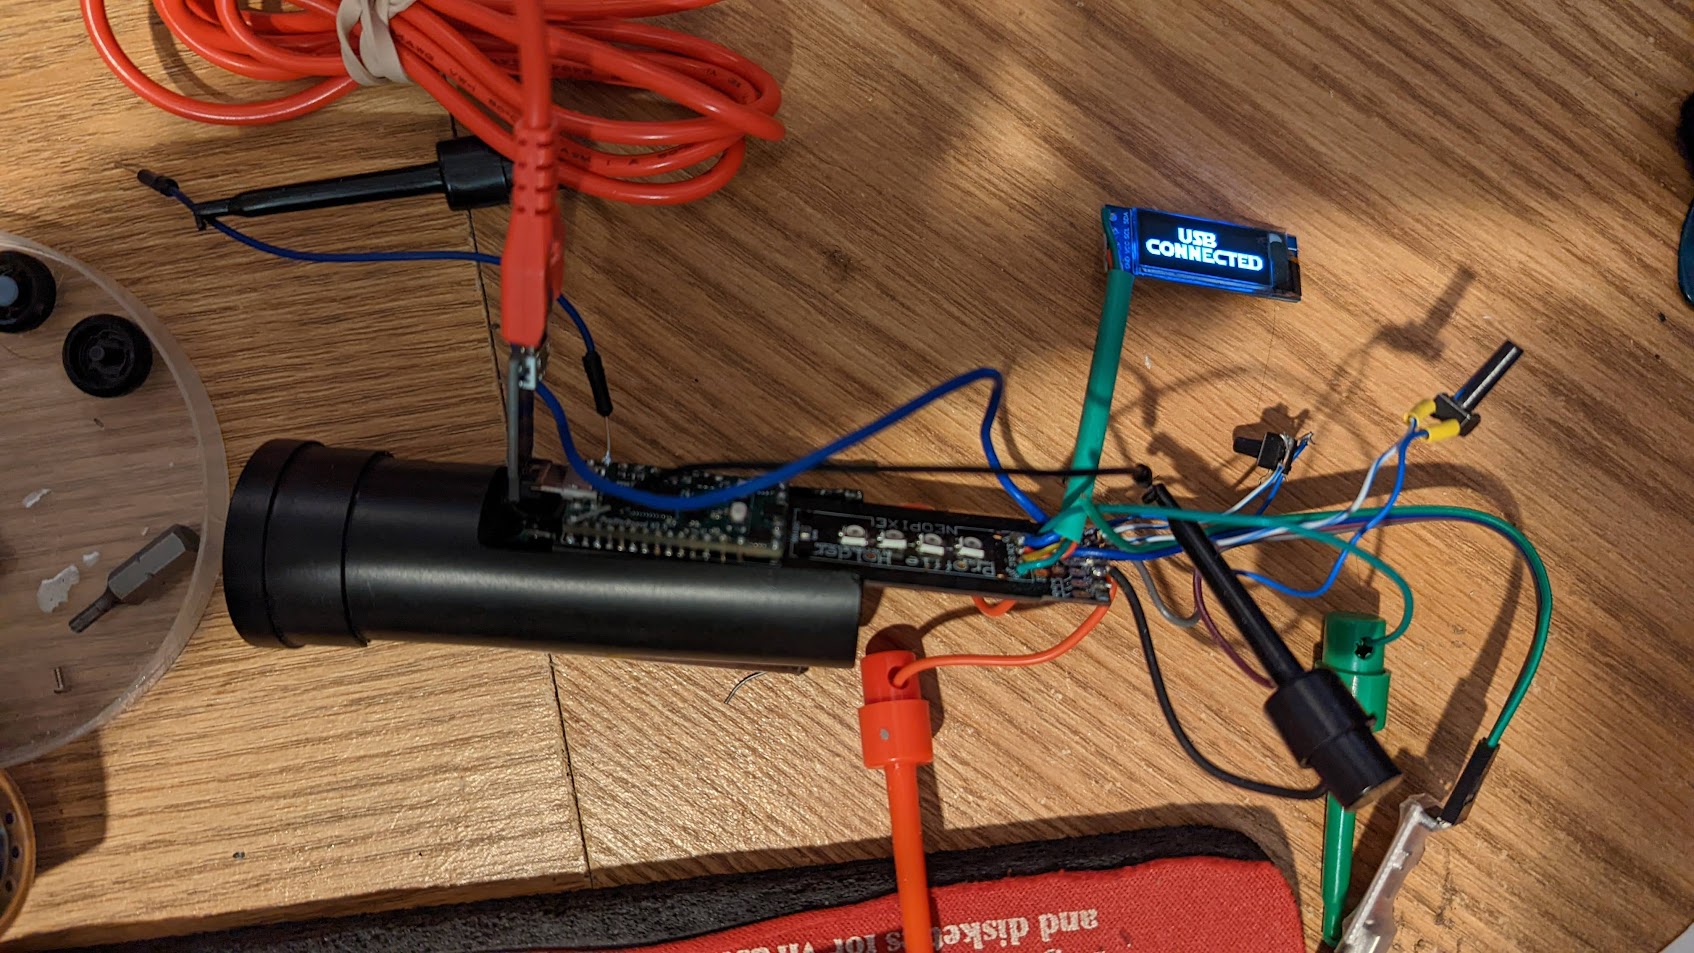
I’ll post a more detailed write-up tonight, but here is the main board:
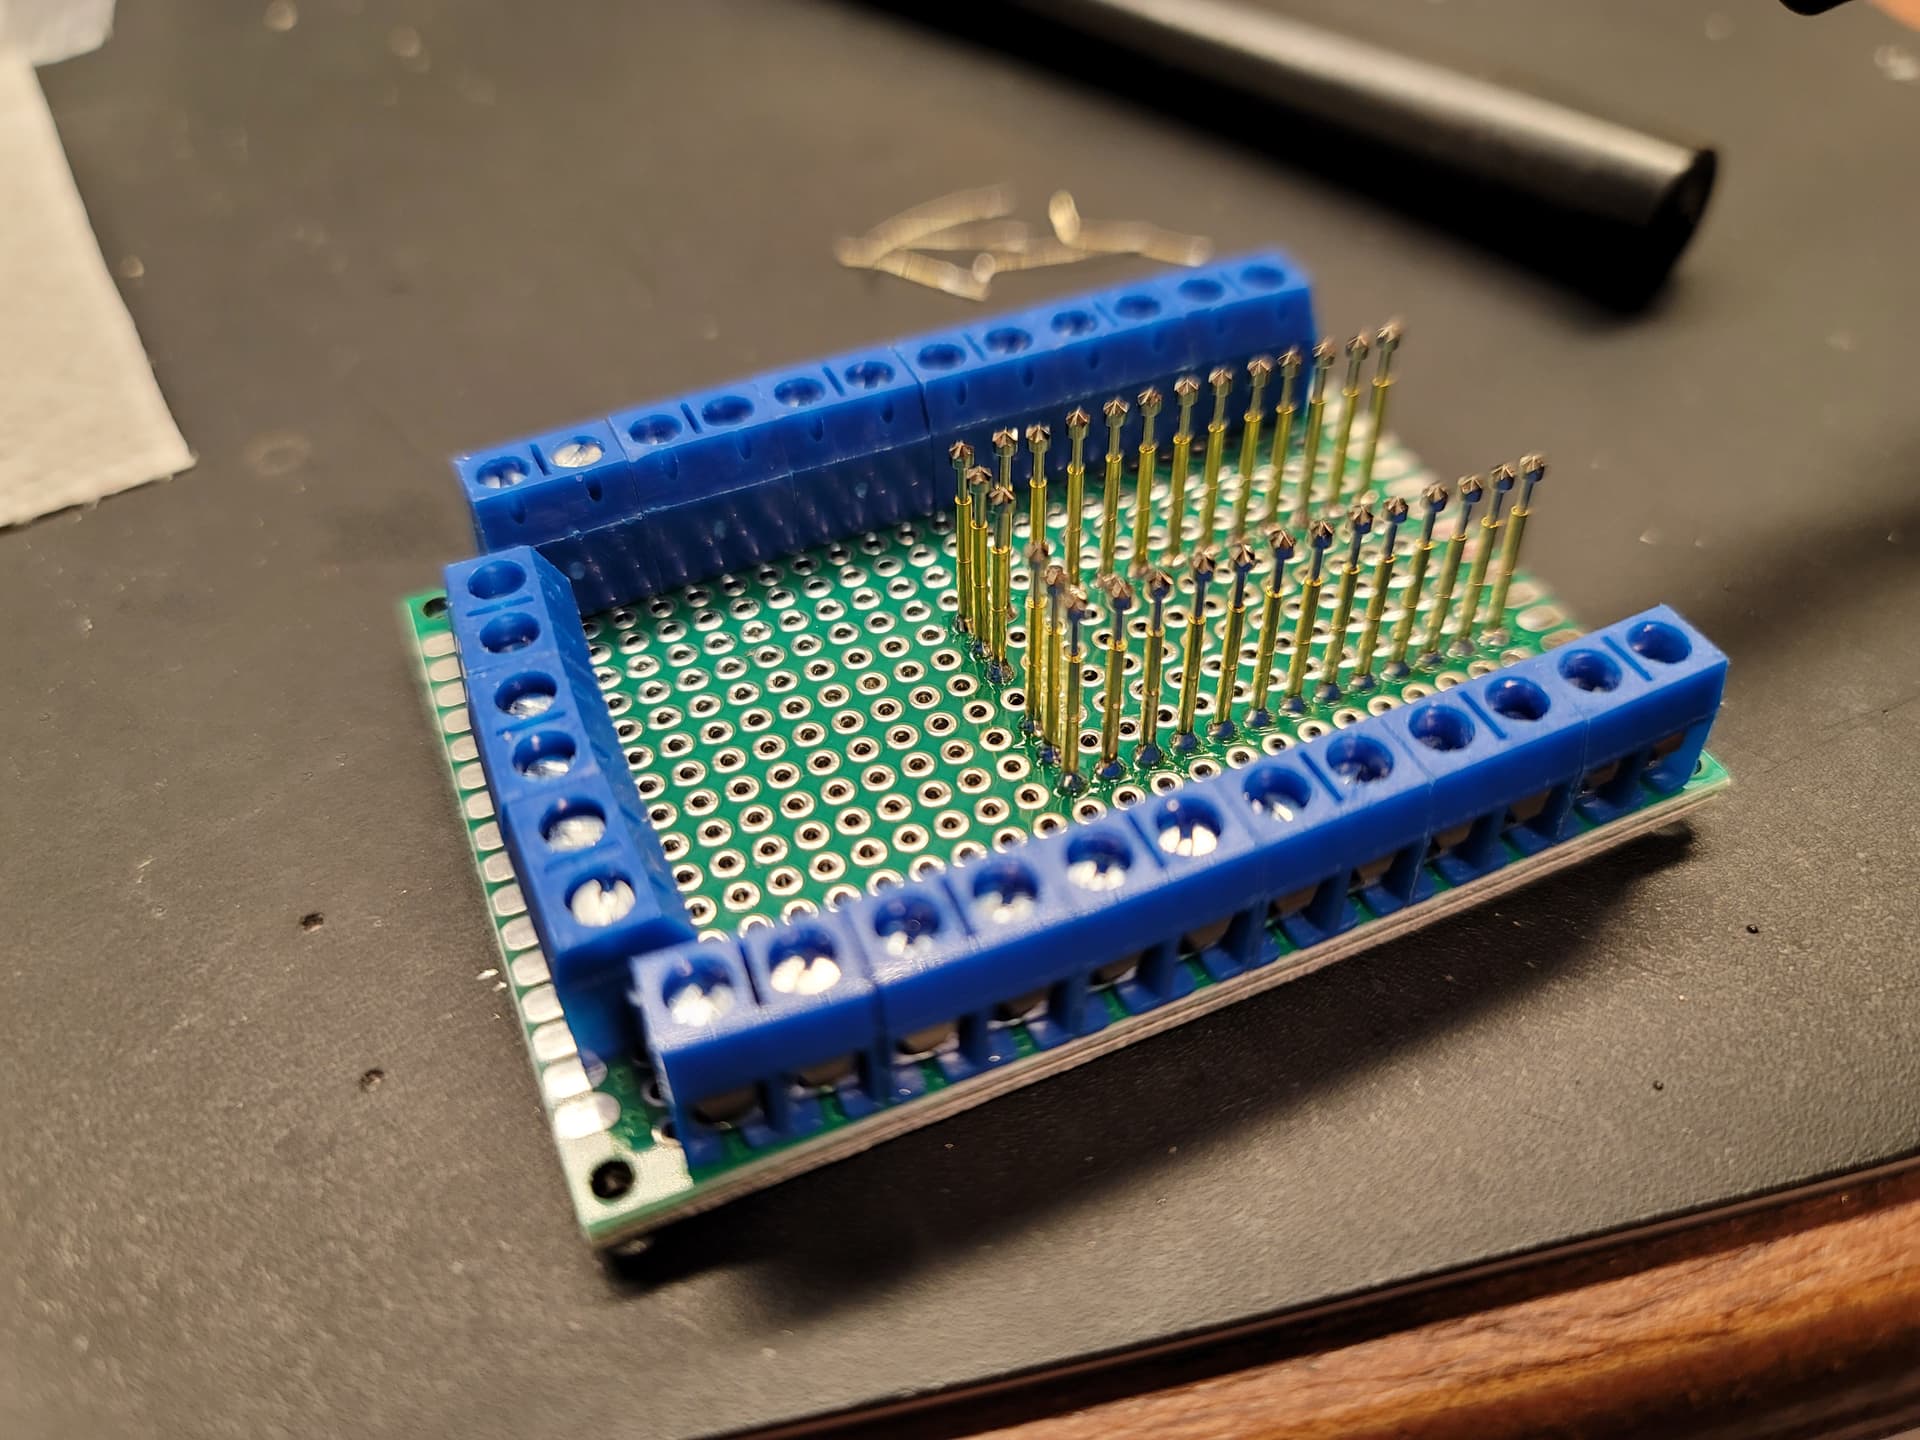
Stacked cheapo protoboard from eBay, with cheap screw connectors, and some star top pogo pins. Stacking the boards helps keep the pins upright.
Here’s the bottom of the board:
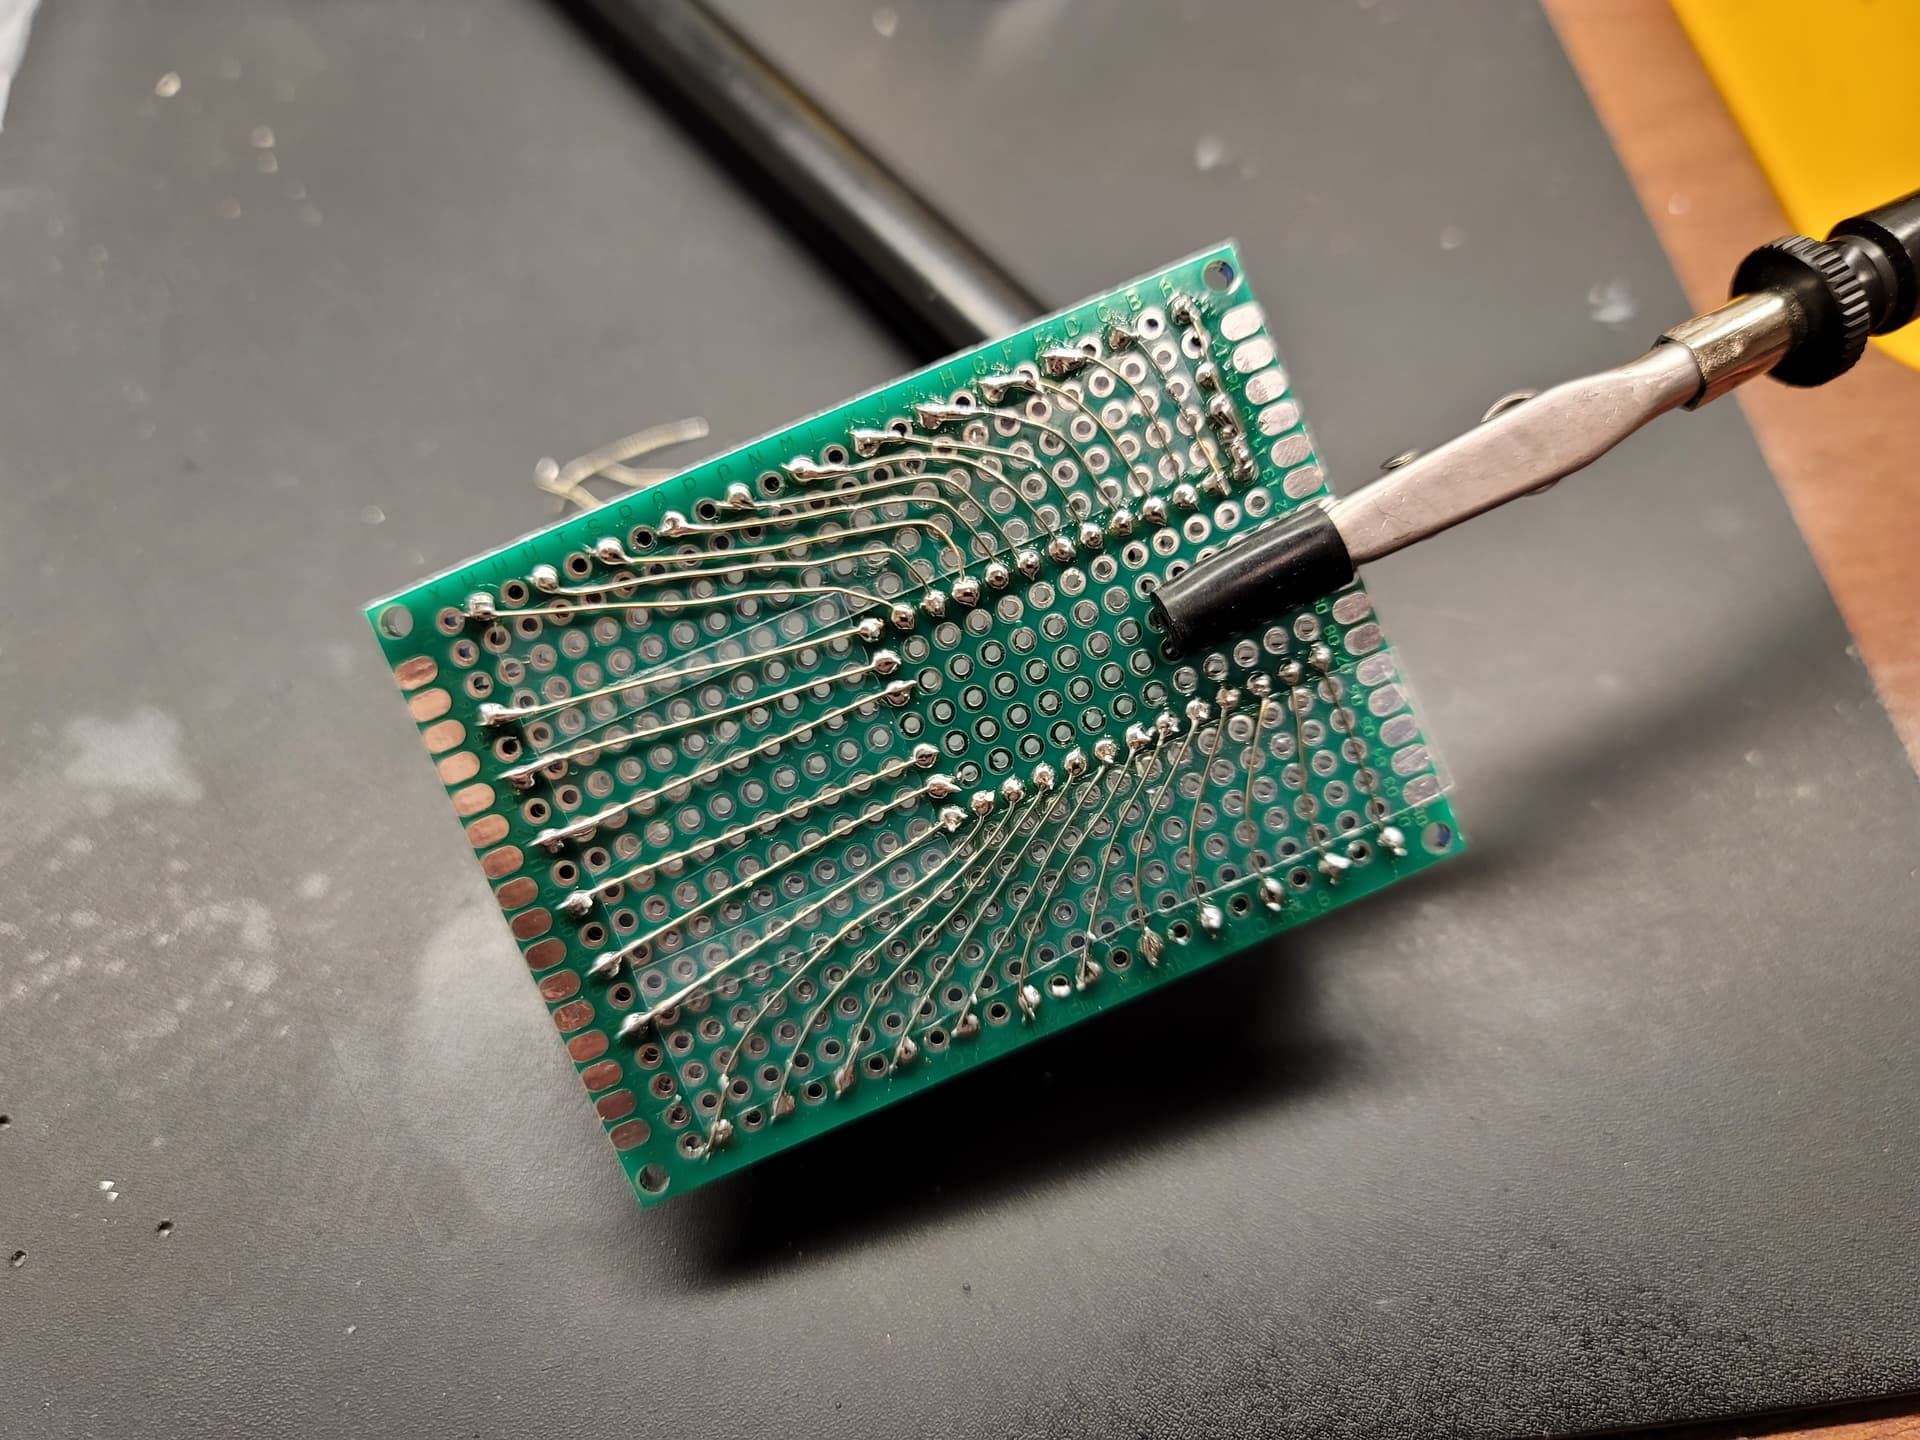
I put some scotch tape over the unused holes to prevent shorts, then soldered some thin tin-plated copper wires to connect everything.
3 Likes
so in keeping with the design I posted up I am printing a test piece to see if it all fits together nicely.
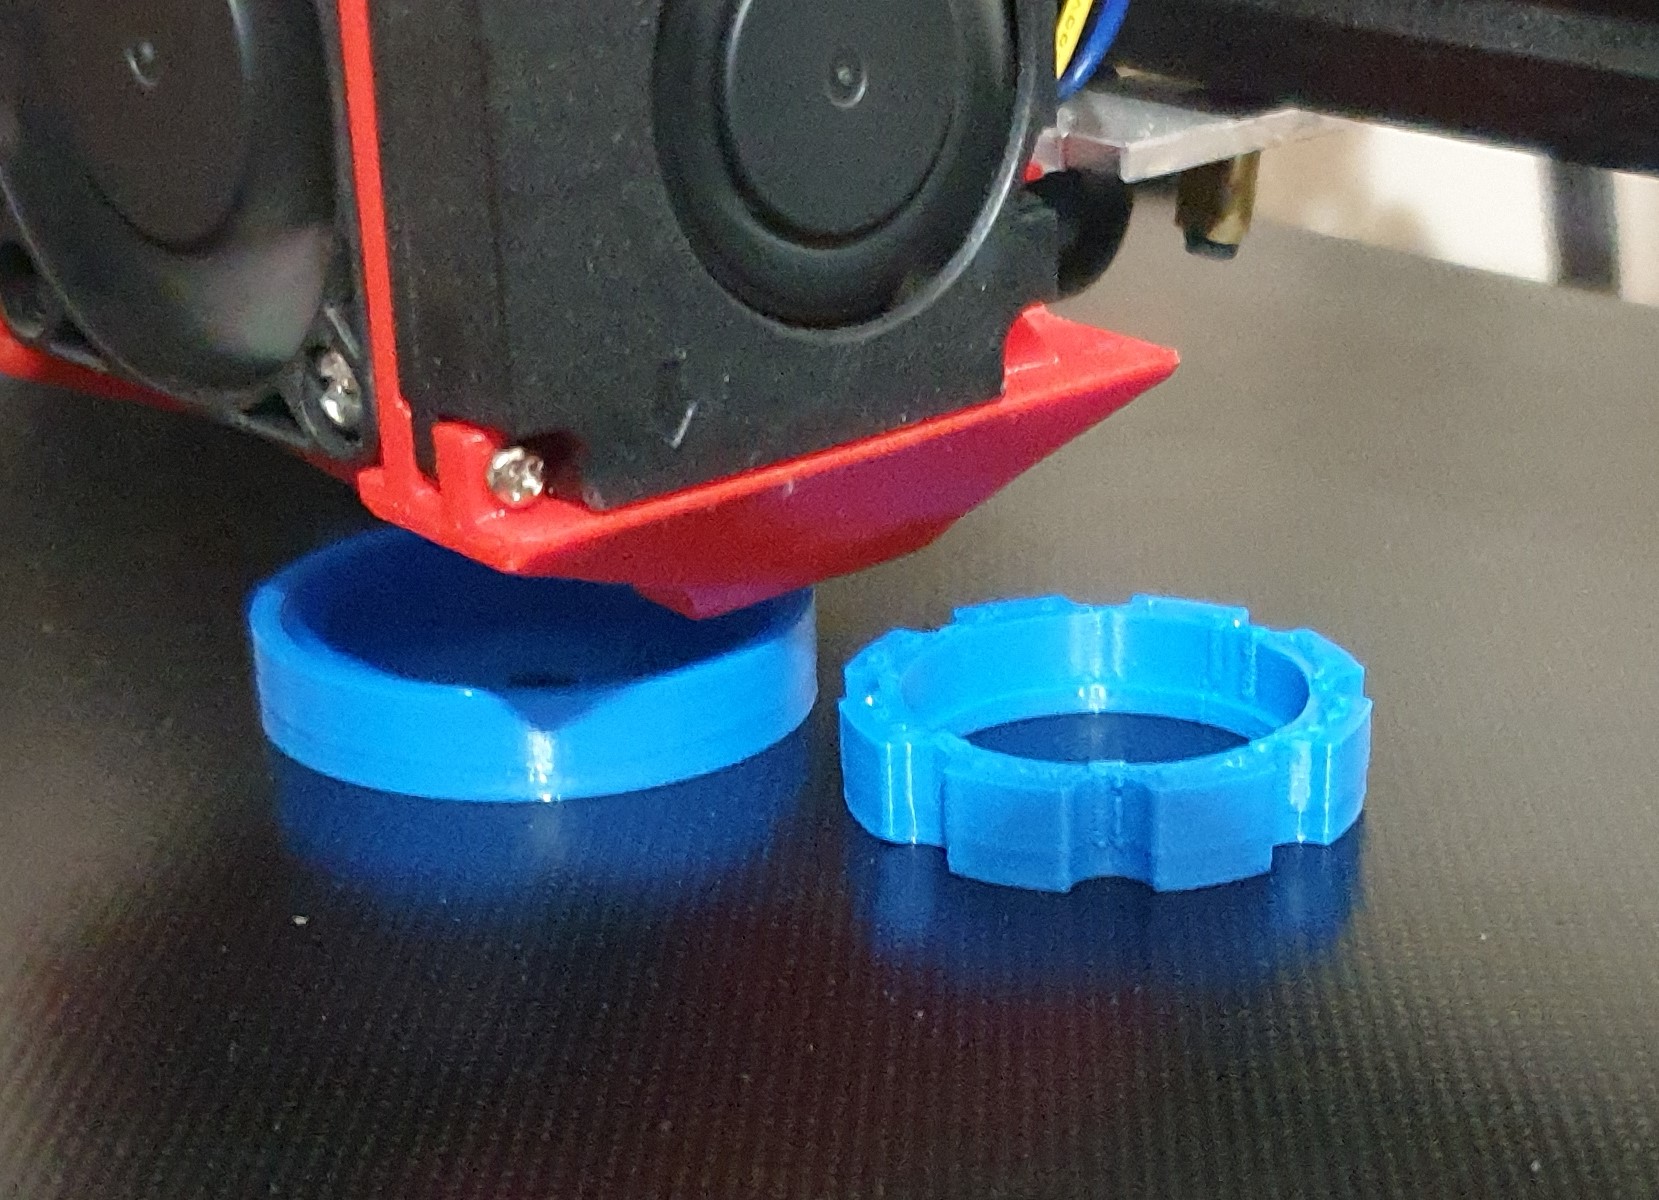
if I’ve got my tolerances right I will print off these.
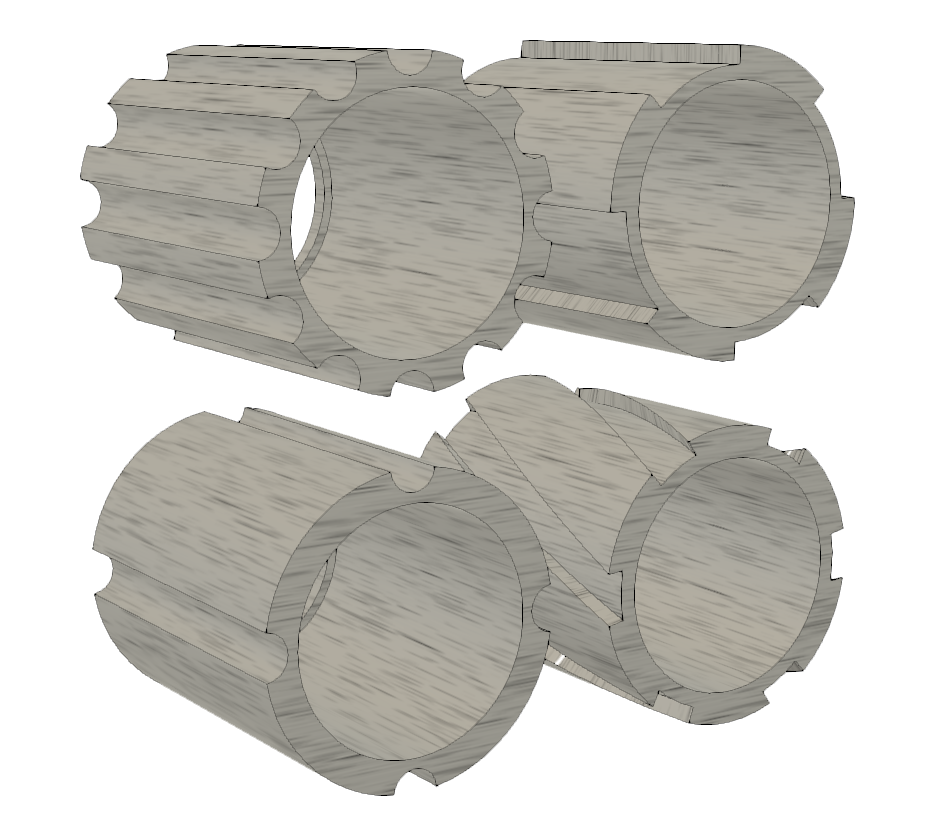
I wanted to do it this way as it will be easier to change the sound holes quickly and it will also give me control over the sound chamber in front of the speaker.
I will be able to change it from 2mm to 13mm deep and see how much it can be tuned to give a desired sound.
I will also be playing with felt and wadding to see if I can deaden the reflected sounds too in a separate test.
as you can see my initial design has 8 holes @ 2.5R
the other variants are 12 hole @ 2.5R, 4 hole @ 2.5R, quarter cut @ 2mm deep and lastly just for fun and because it looks cool I did a riffling effect. (it will probably sound the worst out of all of them!)
1 Like
Very nice! Hopefully your tests will give us some good data on what works and what doesn’t.
Keep us posted!
1 Like
will do, just got to set up my test ring properly as it was a bit slap dash.
got some new bits coming to make it better for playing around with.
should give ne a bit of time to get some prints done for testing.
Okay, next idea…screwless blade holding. @Driftrotor, I saw your idea to use O-rings a few months back, and it got me thinking.
I’ve always hated having to have a ugly thumbscrew or worse, a setscrew which needs a separate tool to use. Not to mention these ding up your blade base.
I actually got inspiration from a bike seat clamp: the idea that a non-uniform cylinder can be rotated to create pressure. Thus, a first crack at a screw-less design:
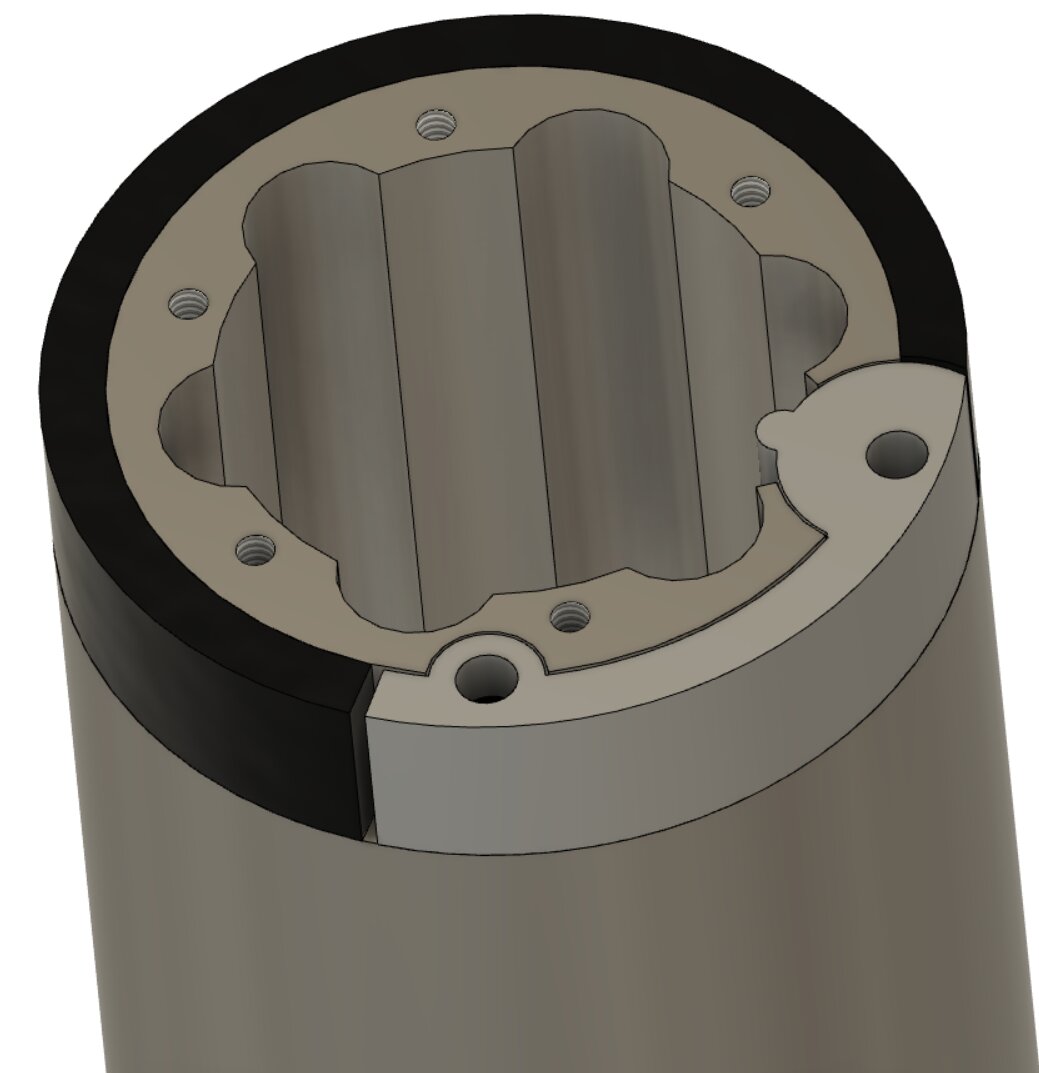
The hole on the right looks like this from the other side:

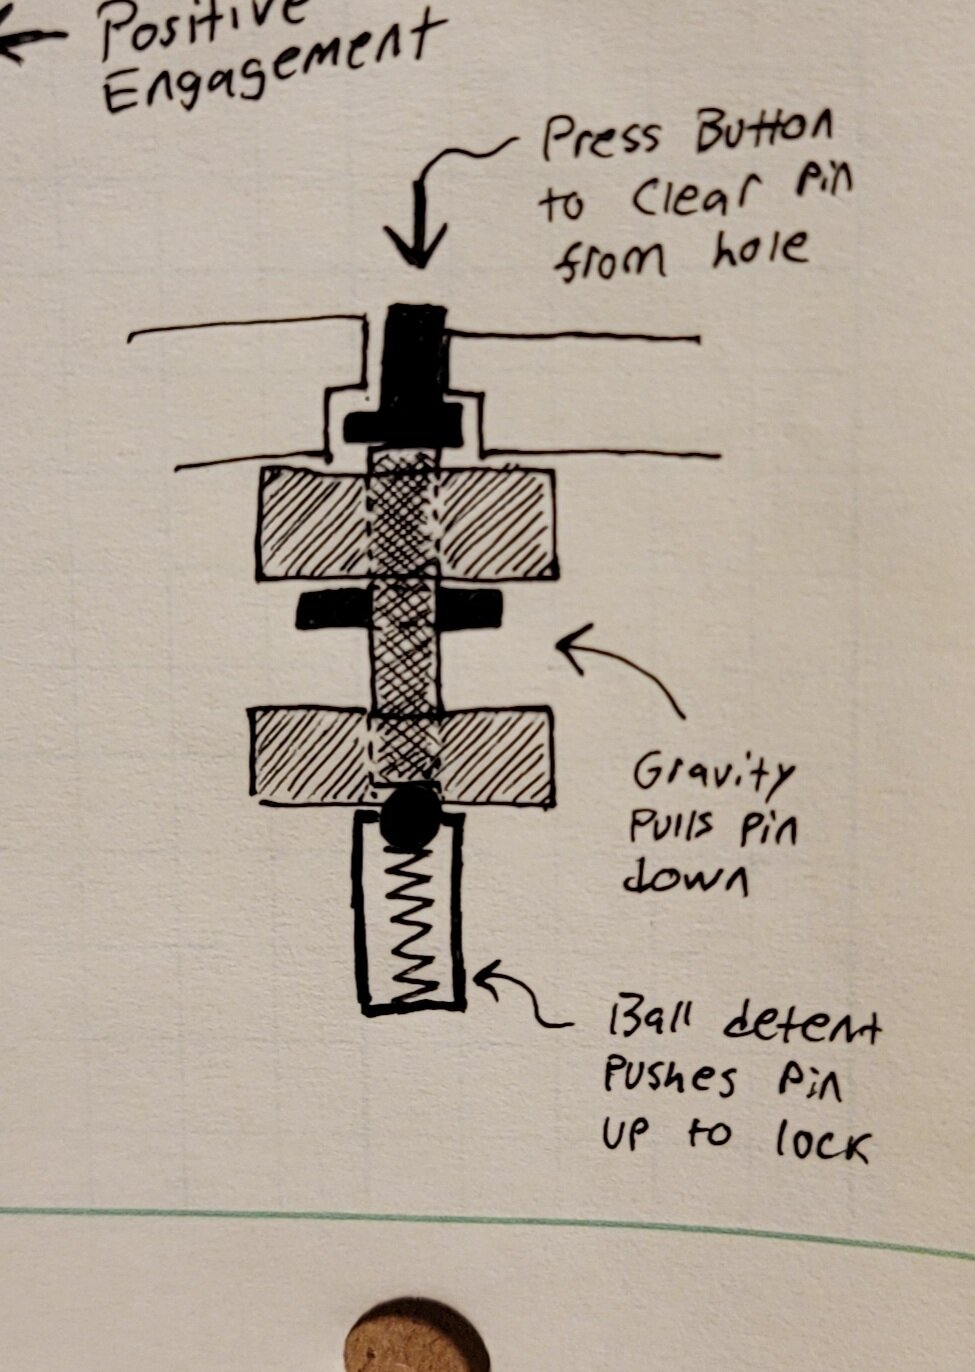
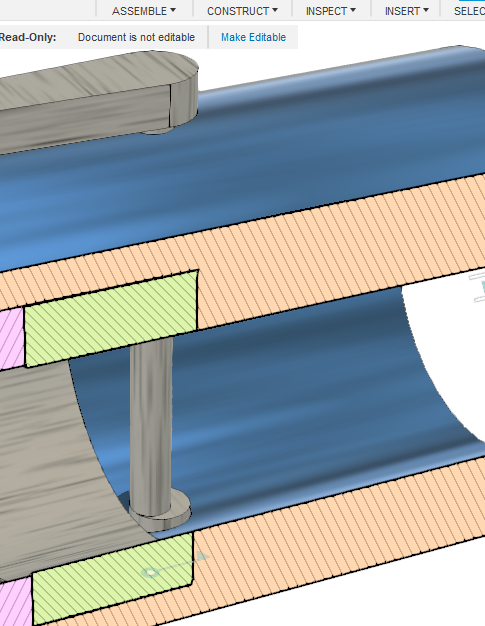
I’ve spent every spare minute unwillingly mulling over a way to reliably lock the arm in place (I obsess over problems). I finally stole the design from a barrel & pin lock, where the end of a central pin must line up with surface before it can move. Here is the concept sketch:
1 Like
I’m seriously impressed 
I also have been toying with different ideas to lock the blade in place.
Behind the scenes i have perfected the o-ring design (secret plans and clever tricks) and I get a perfect lock with it without sacrificing my blade😁
Sounds to me like your on to a winner with this.
I assume you will be printing it out to test?
It seems that you and I are cut from the same cloth🤣
so I dug out some of my concepts to add to the pile.
standard cam lock that I stole from my mountain bike.
this one was a bit more ambitious with the cam being inside the hilt in an attempt to make it more stream lined. although it looks cool it would be near impossible to machine.
if anyone wants to take these and see if they can be improved then by all means please have a go.
I’m sure @mcarcher and myself would be very interested to see what anyone else can bring into the mix! 
1 Like
been doing a bit more digging around on the web to see what was available that could be adapted to suit our needs.
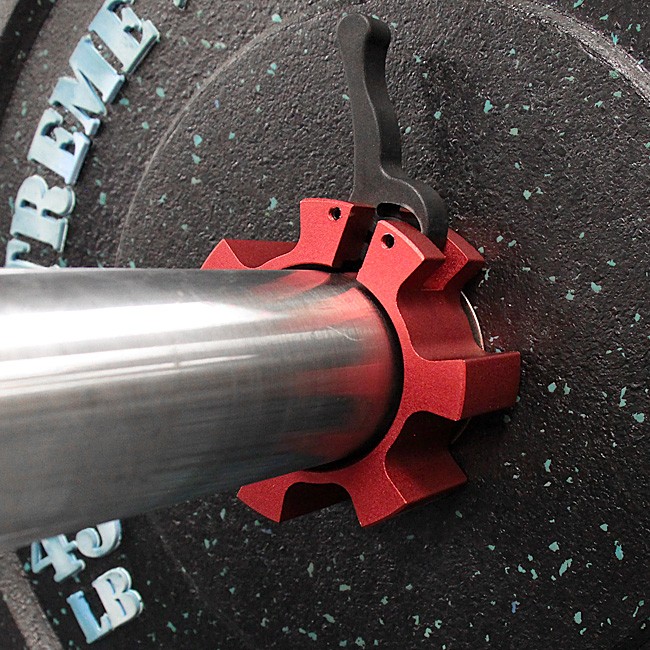
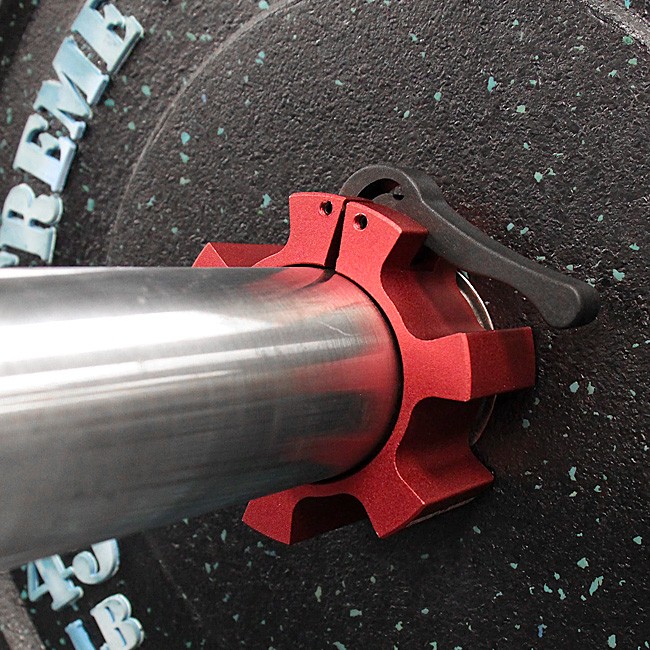
these caught my attention and are similar to a Rulland collar.
wondering if it was possible to hide the handle as part of the hilt so when it was closed into the locking position it would effectively be hidden?
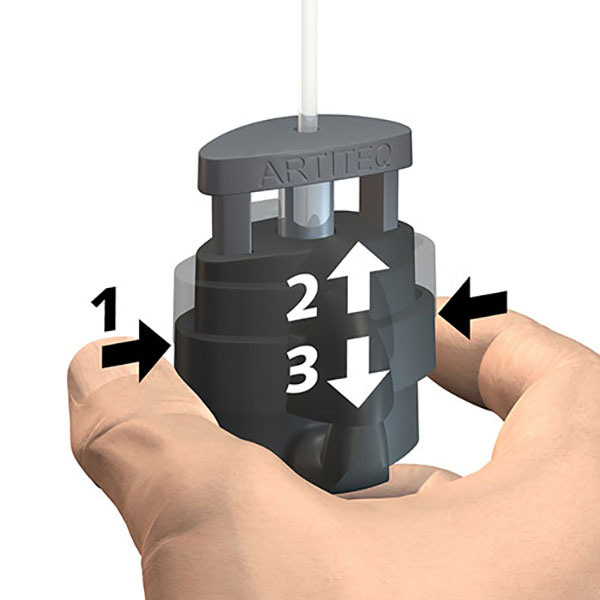

these I found rather intriguing, a squeeze to unlock mechanism.
might be worth a look into but might also be a little hard to operate as the spring to clamp the blade securely might be quite tough to compress.
The problem with a cam lock that squeezes the emitter itself is that it requires some sort of slot to be cut.
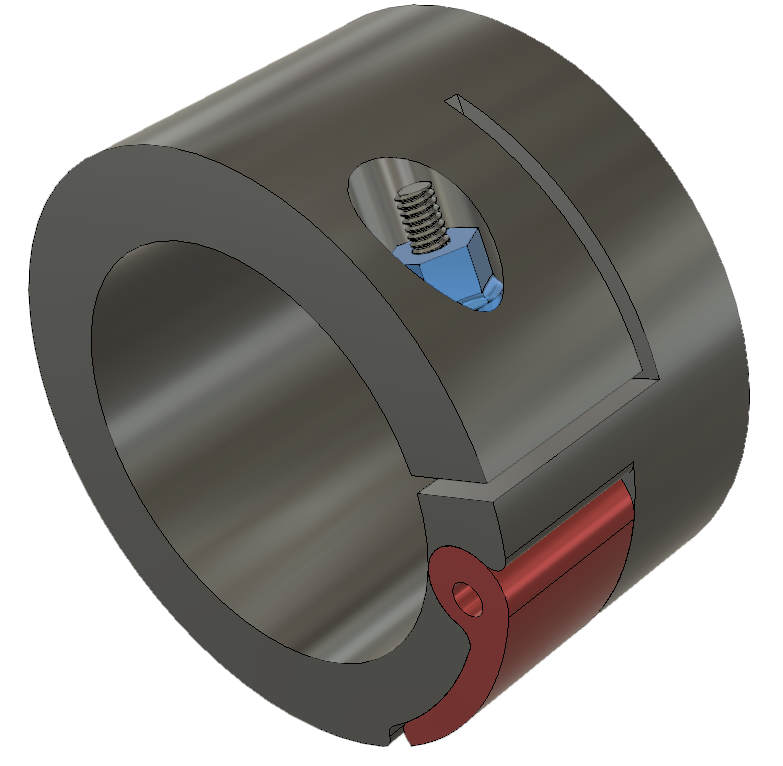
I actually have a cool shaft gripping coupling that uses 4 small steel balls to go into a groove on a shaft. I’ll post a picture of it. I got it from work, and the neat thing about it is that once the balls are fully extended, the force on them acts radially on the slide, so they won’t come out. The only problem is that it requires a groove in the blade, which just seems like it will lead to a broken blade.
1 Like
I know what you mean with the cam lock.
Do you mean something like a quick release pneumatic fitting.
The collar holds the steel balls in a recessed grove and holds the inserted piece until the collar is moved and the balls released.
Yes, exactly…except it has a 1-inch bore.
1 Like
Here is the fitting I was talking about:

Also, on another note, the chuck for my rotary table came in, so now I can finally make stuff like this:
2 Likes
did you get a chance to have a play with some sound deadening material in the sound chamber?
just curious as to what if any change was noticeable?
not had a chance to play with my set-up as of yet, still waiting on some parts to turn up first.
fingers crossed they do this week and then I will be on it asap.
I have not had a chance to test it yet…I’ve been putting my head down designing the rest of the saber. I want to get any PCB’s and 3D printed metal parts ordered and then I can work on the short-term stuff while waiting for those to come.
1 Like
update time.
@mcarcher and myself have been working hard behind the scenes perfecting this concept and have been able to produce some good results.
for those of you that like to tinker and create your own hilts this may be of interest to you.
the initial idea to have a speaker just underneath the blade holder to produce sound out of the emitter has proven very fruitful in both sound quality and volume.
@mcarcher was right (in my opinion) that sound is projected from the wrong end of the saber so much of the interaction / immersion is being lost.
so we wanted to see if this is something that could be achieved and help improve the experience.
we quickly worked out that the bigger the sound holes or the number of them produced the best volume but the bass was lacking until we introduced a resonance chamber behind the speaker.
this is one of the concept drawings we’ve been working on.
it is still a work in progress to make it as compact as possible and to how we can incorporate this into hilt / chassis design.
but the sound is very good and the bass response has been improved several fold.
we are hoping to do more tests against standard hilt / speaker designs to see what gains we have managed to produce.
so still lots more to come!
1 Like